From time to time, you may need to download footage from the platform. This may be for insurance purposes or to provide it to the police, for example. There are driving and speeding events, but now we will look at how to pull and view footage from a date and time that you choose.
Where to get Ad Hoc Footage
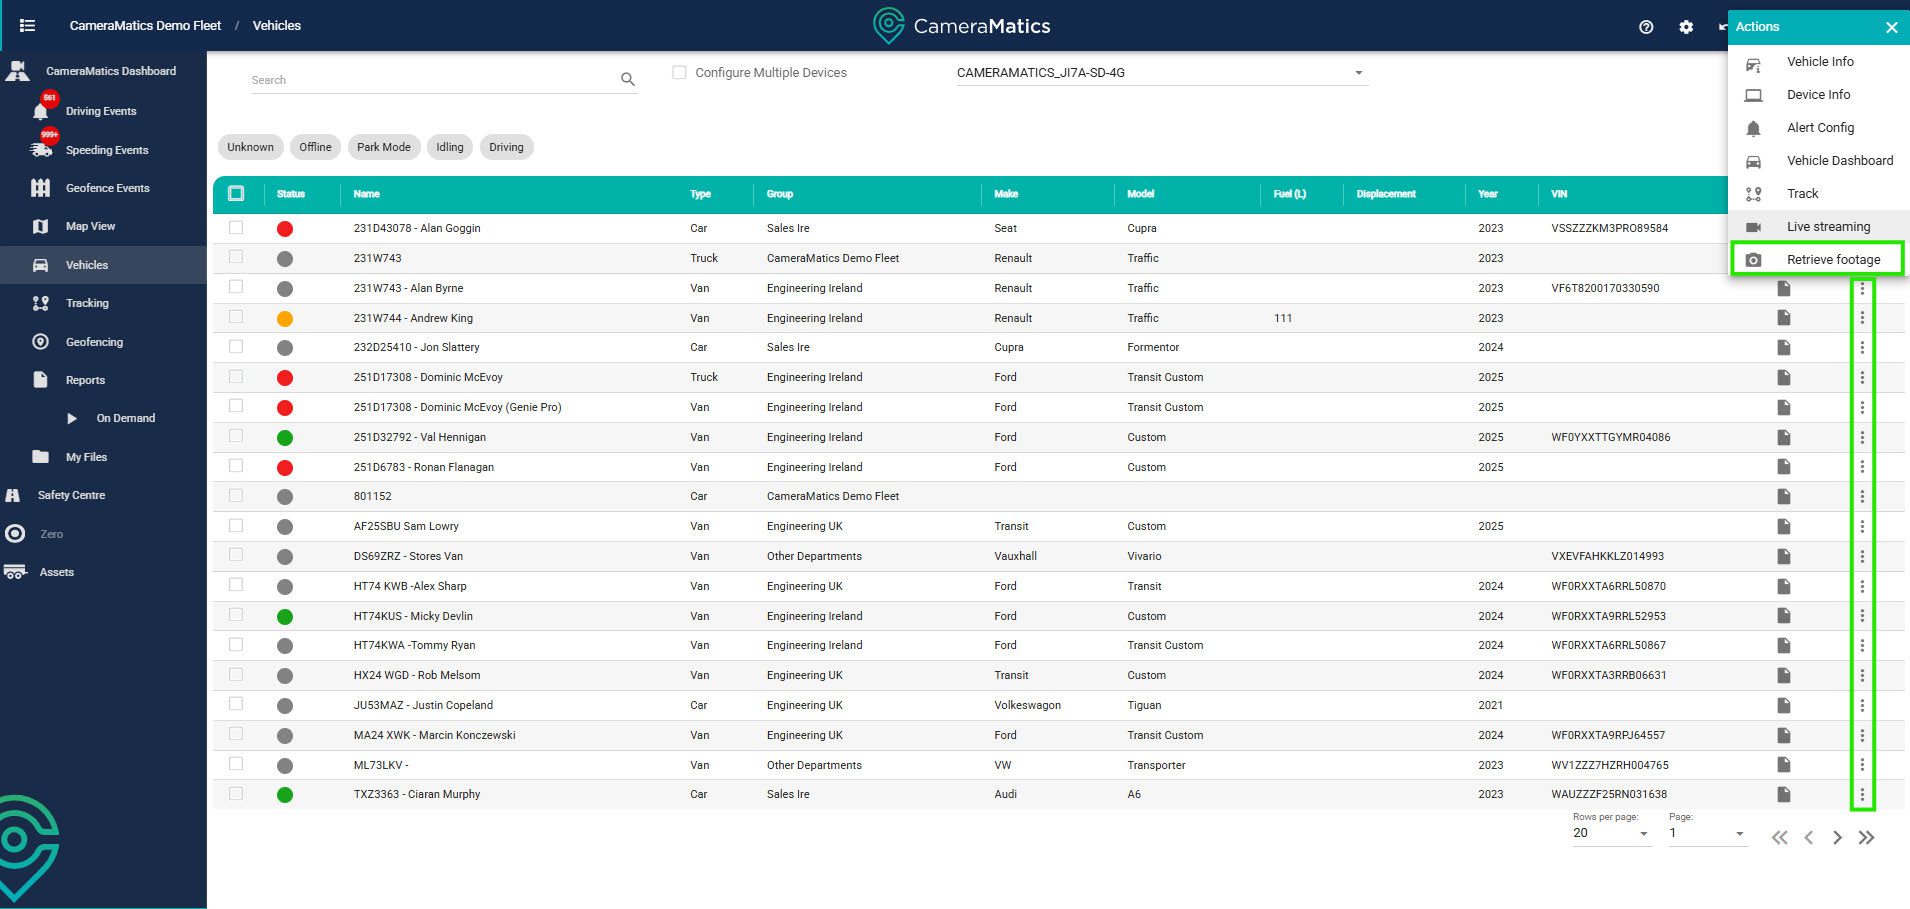
There are a number of areas within the platform to pull ad hoc footage. You must make sure, however, that the vehicle status is either Driving (Green), Idling (Amber/Yellow or Park Mode (Red). The most common are:
- Vehicle List – By clicking the 3 dots to the right of a vehicle, you canclick Retrieve Footage.

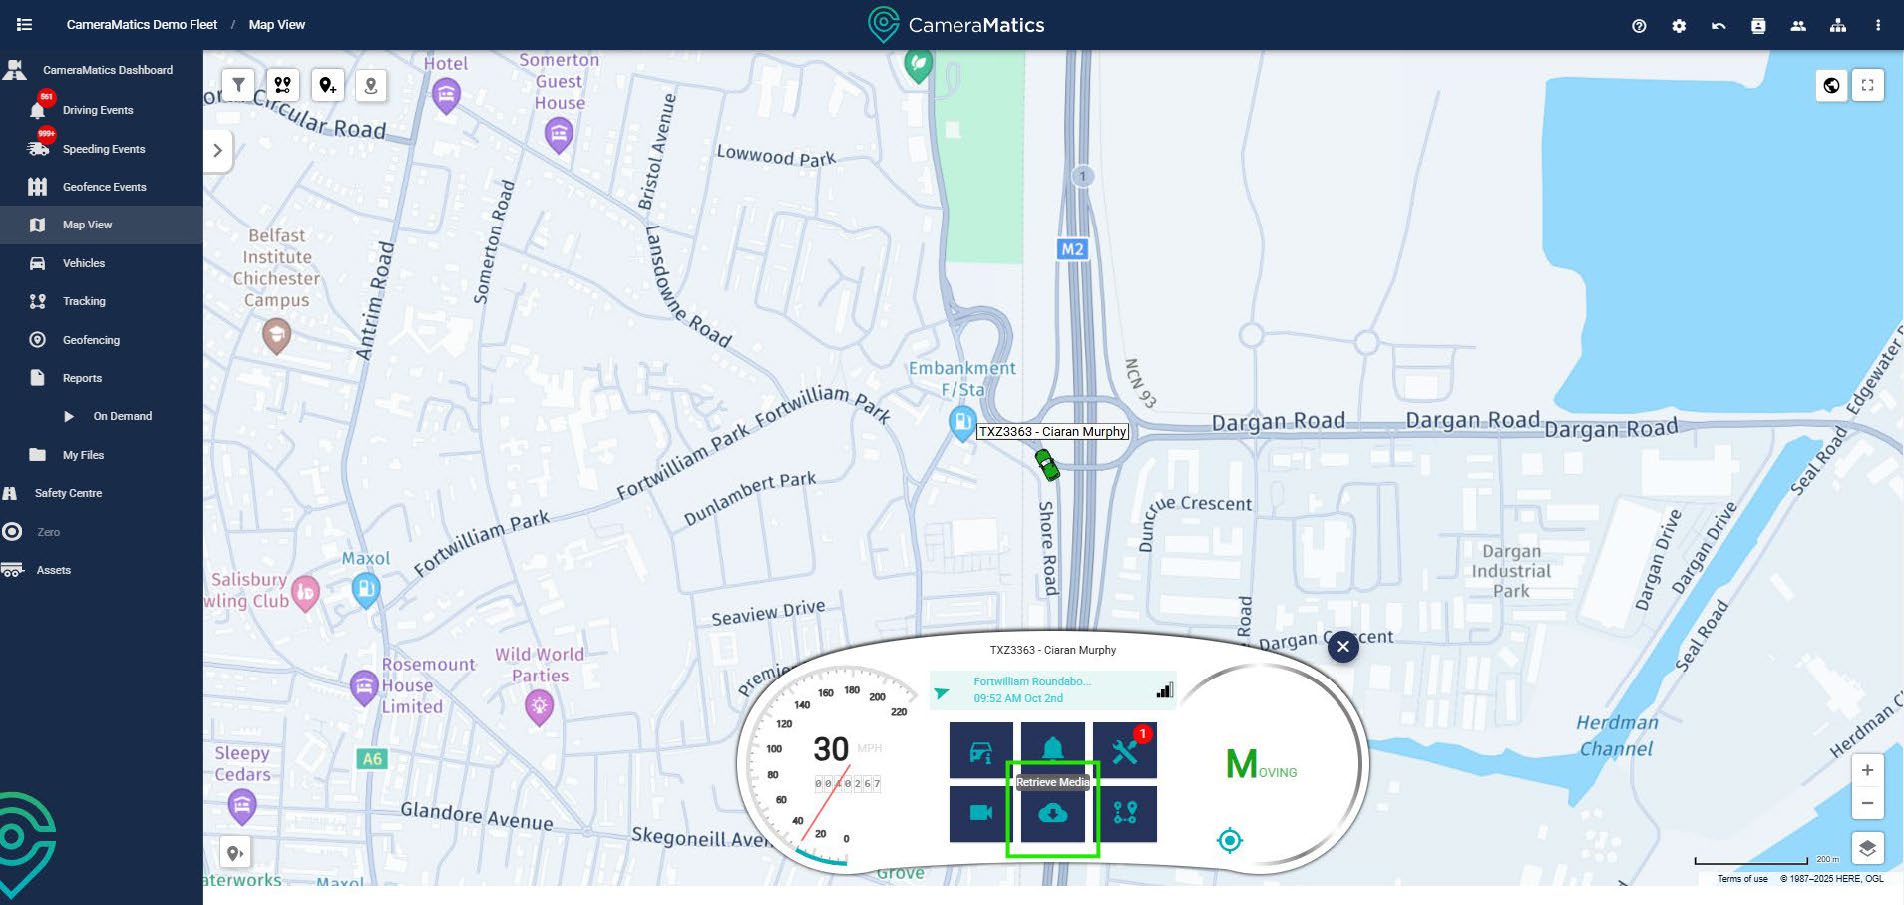
- Map View – In the map view, you can select a vehicle, and you will seethe Retrieve Media button in the bottom row.

Retrieving Footage
Whichever way you decide to pull footage from the process is the same across the platform.
You will get a pop-up, and then you will need to specify the date, time and duration of the footage you want. Note, you can only run 5 minutes at a time.
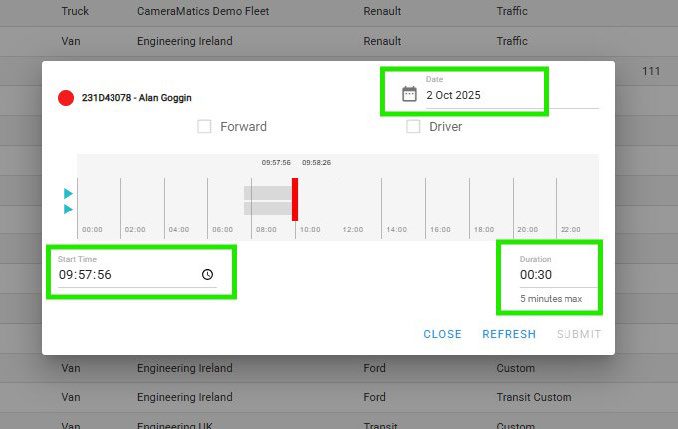
You can select the footage to store by checking the relevant cameras, and also preview the footage by clicking on play to the left.
Once you are satisfied, click submit to send the footage to the cloud to keep indefinitely.

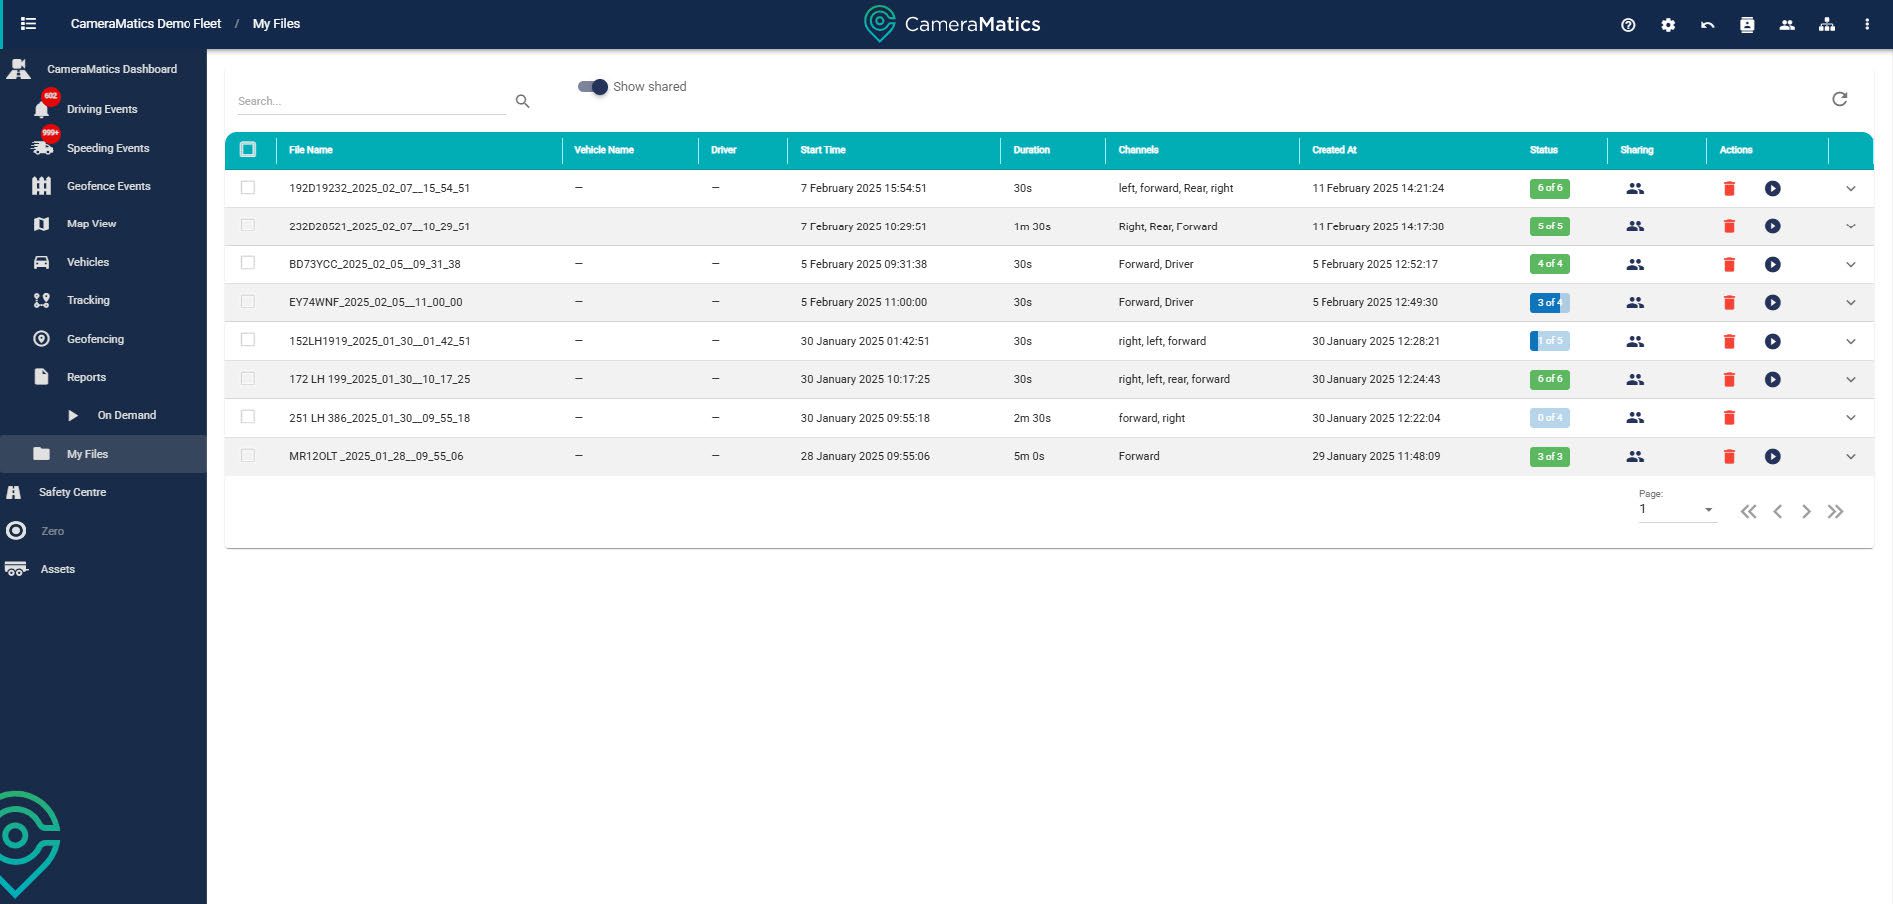
Footage and My Files
Once you have submitted footage to the cloud, you can then access it through the My Files found in the left-hand side menu.
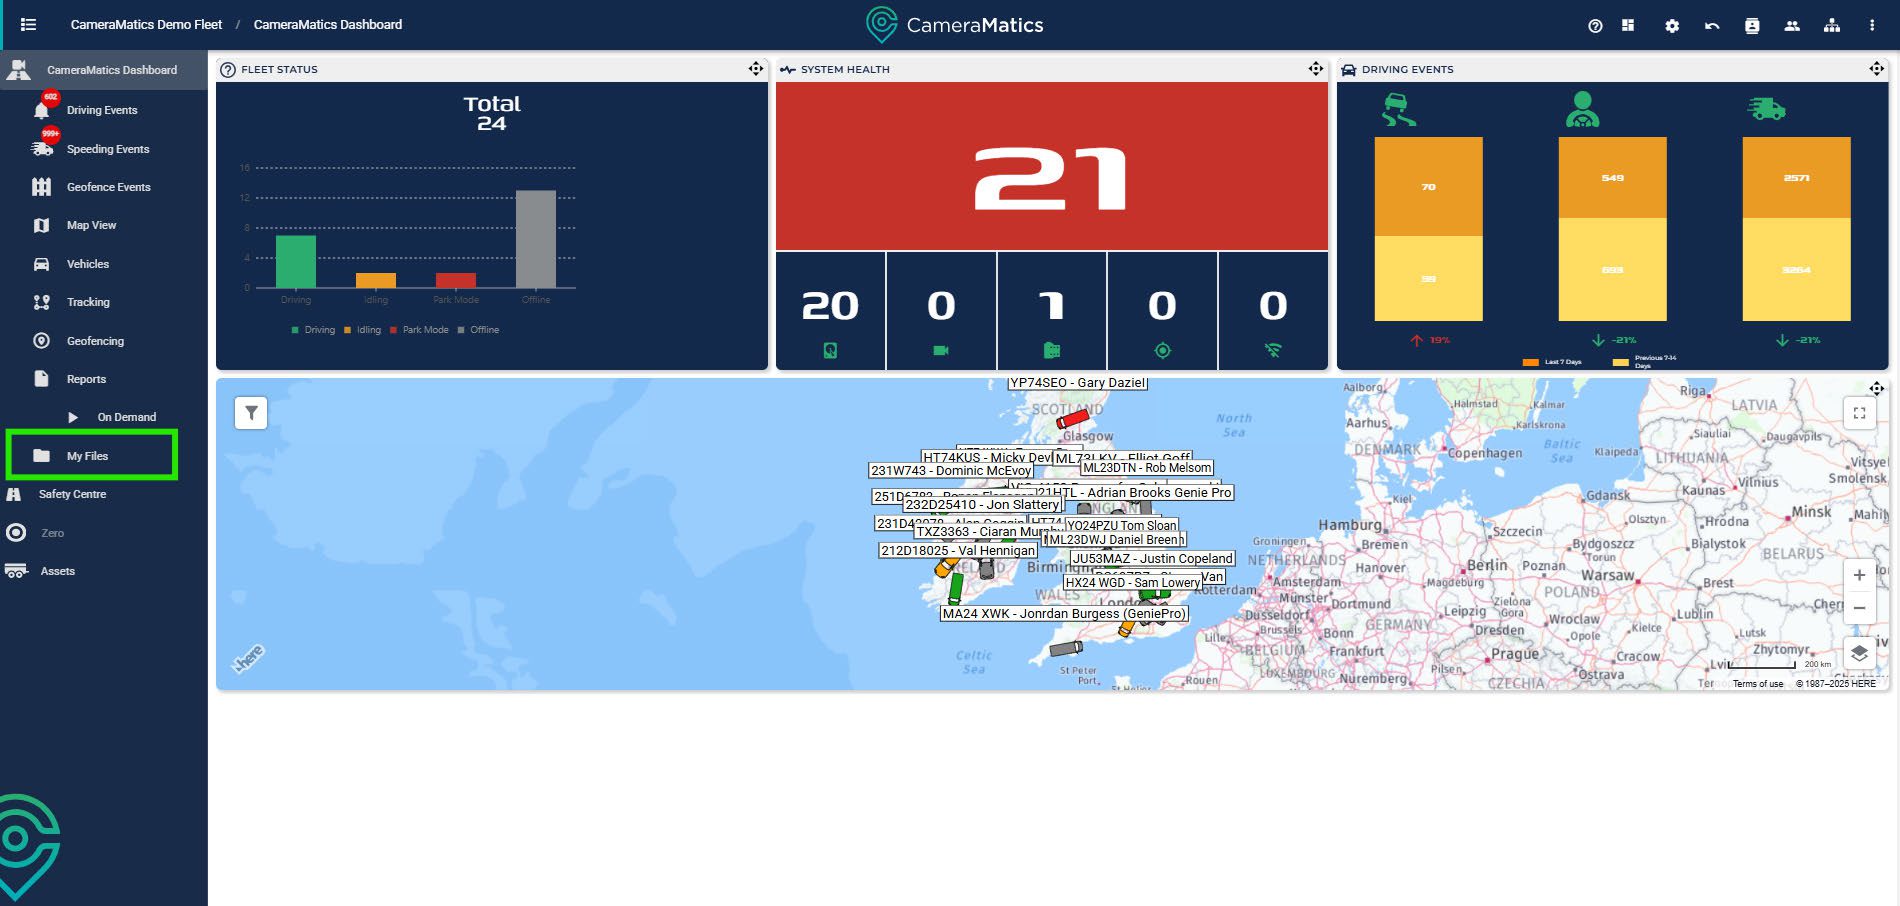
You will then see a list of all footage that you have submitted to the cloud for storage.
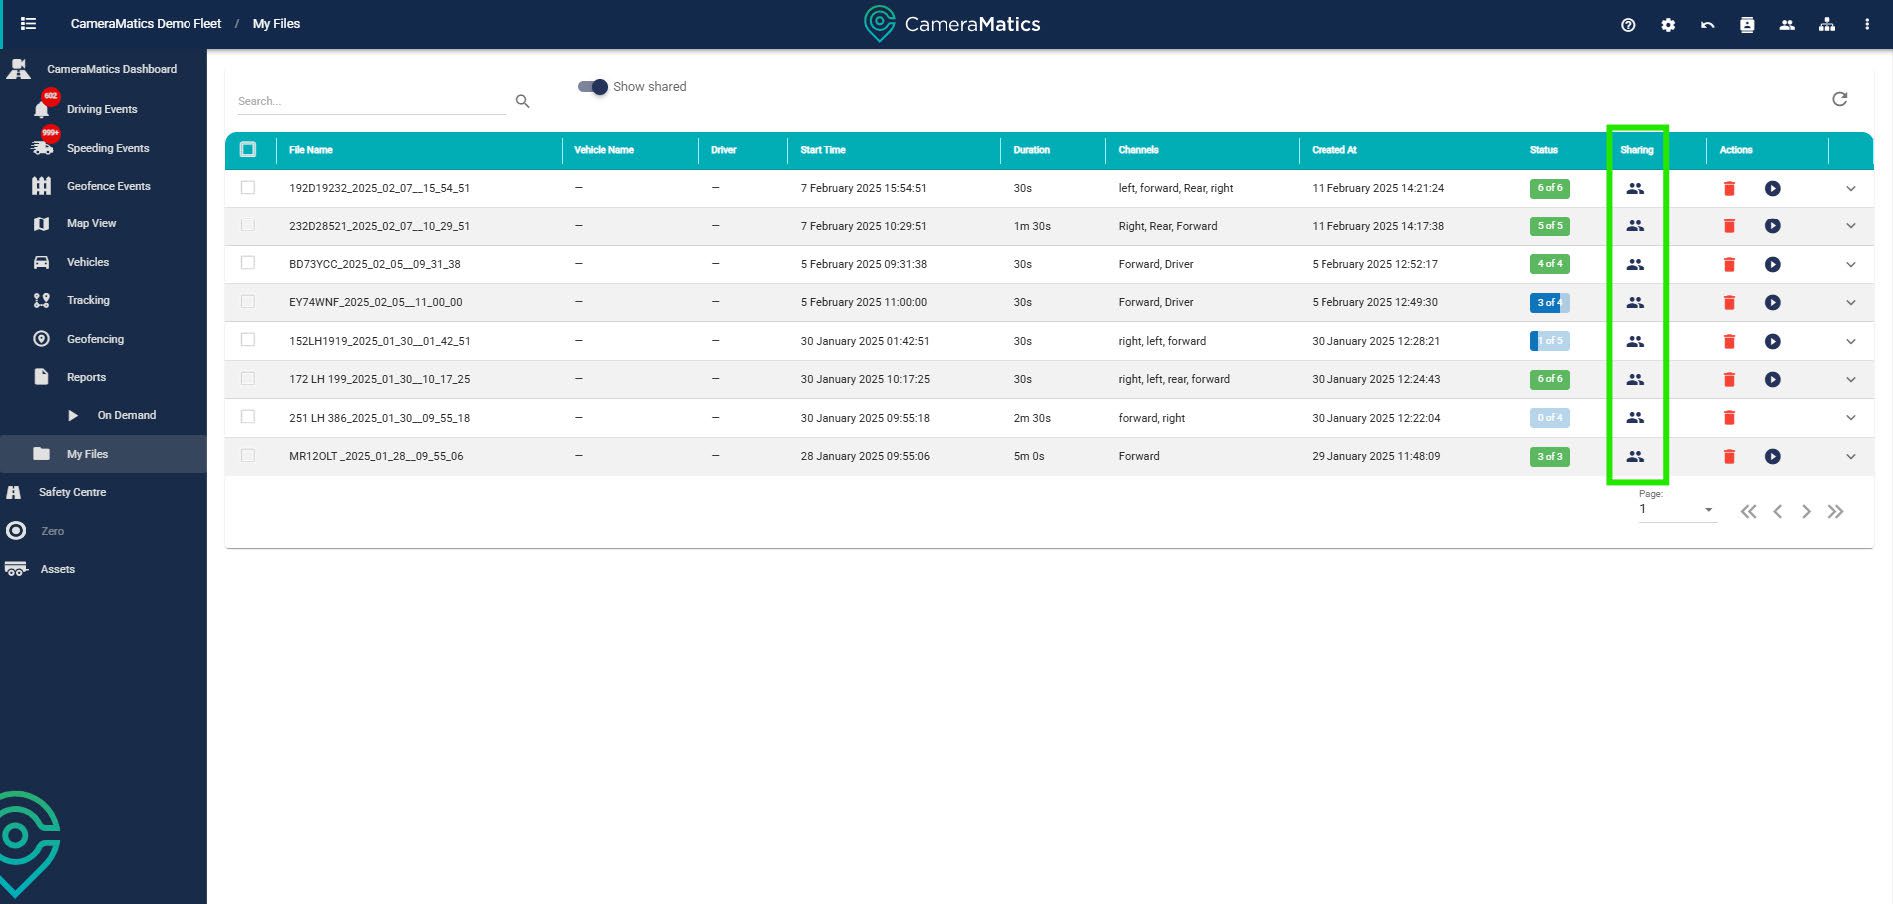
You can also share this footage with anyone who is within your contacts list. They can be internal or external contacts.


 - CameraMatics")


