Workflows are a great way to ensure that common tasks are performed consistently, accurately, and transparently. Vehicle inspections are just one of many great use cases for this feature.
You can create and schedule different types of workflows in CameraMatics. All of them can then be assigned to specific drivers or employees, and then completed as required from the mobile app.
Creating Workflows
To create workflows, it is recommended to ensure that all the relevant questions or steps you wish to include are already in the system. That will involve creating questions, as described below
Create your Questions
Create Individual Questions
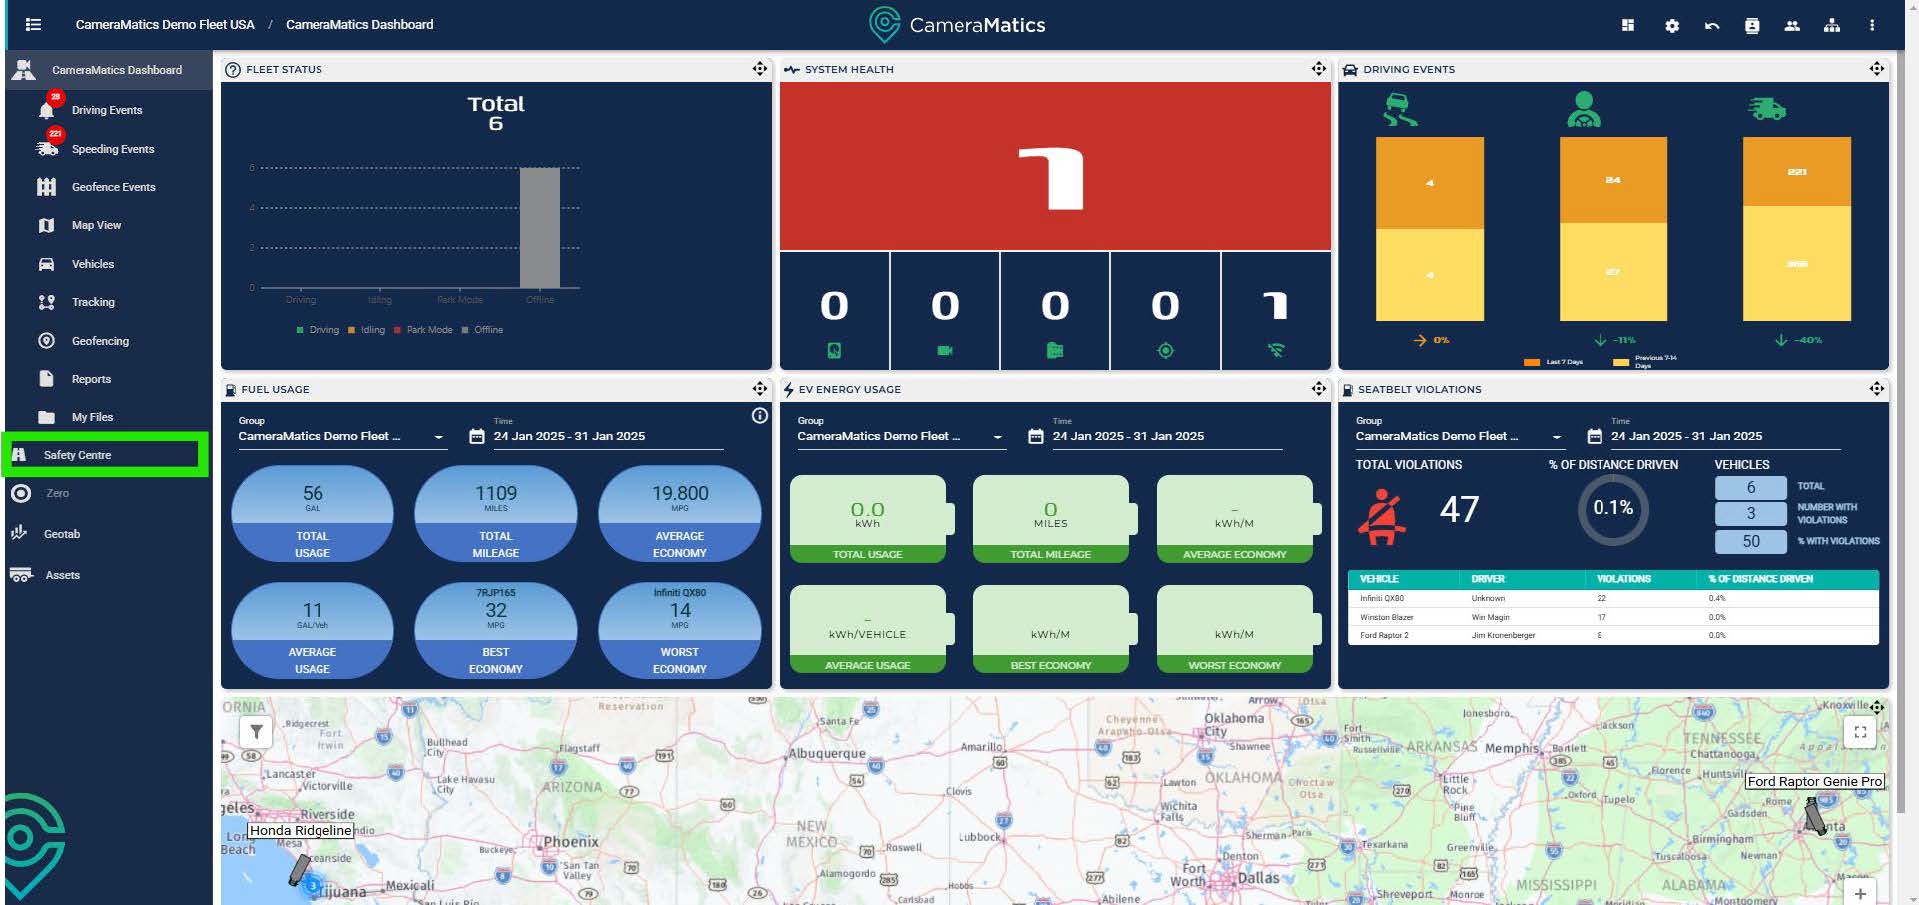
From the main dashboard, click on Safety Centre.
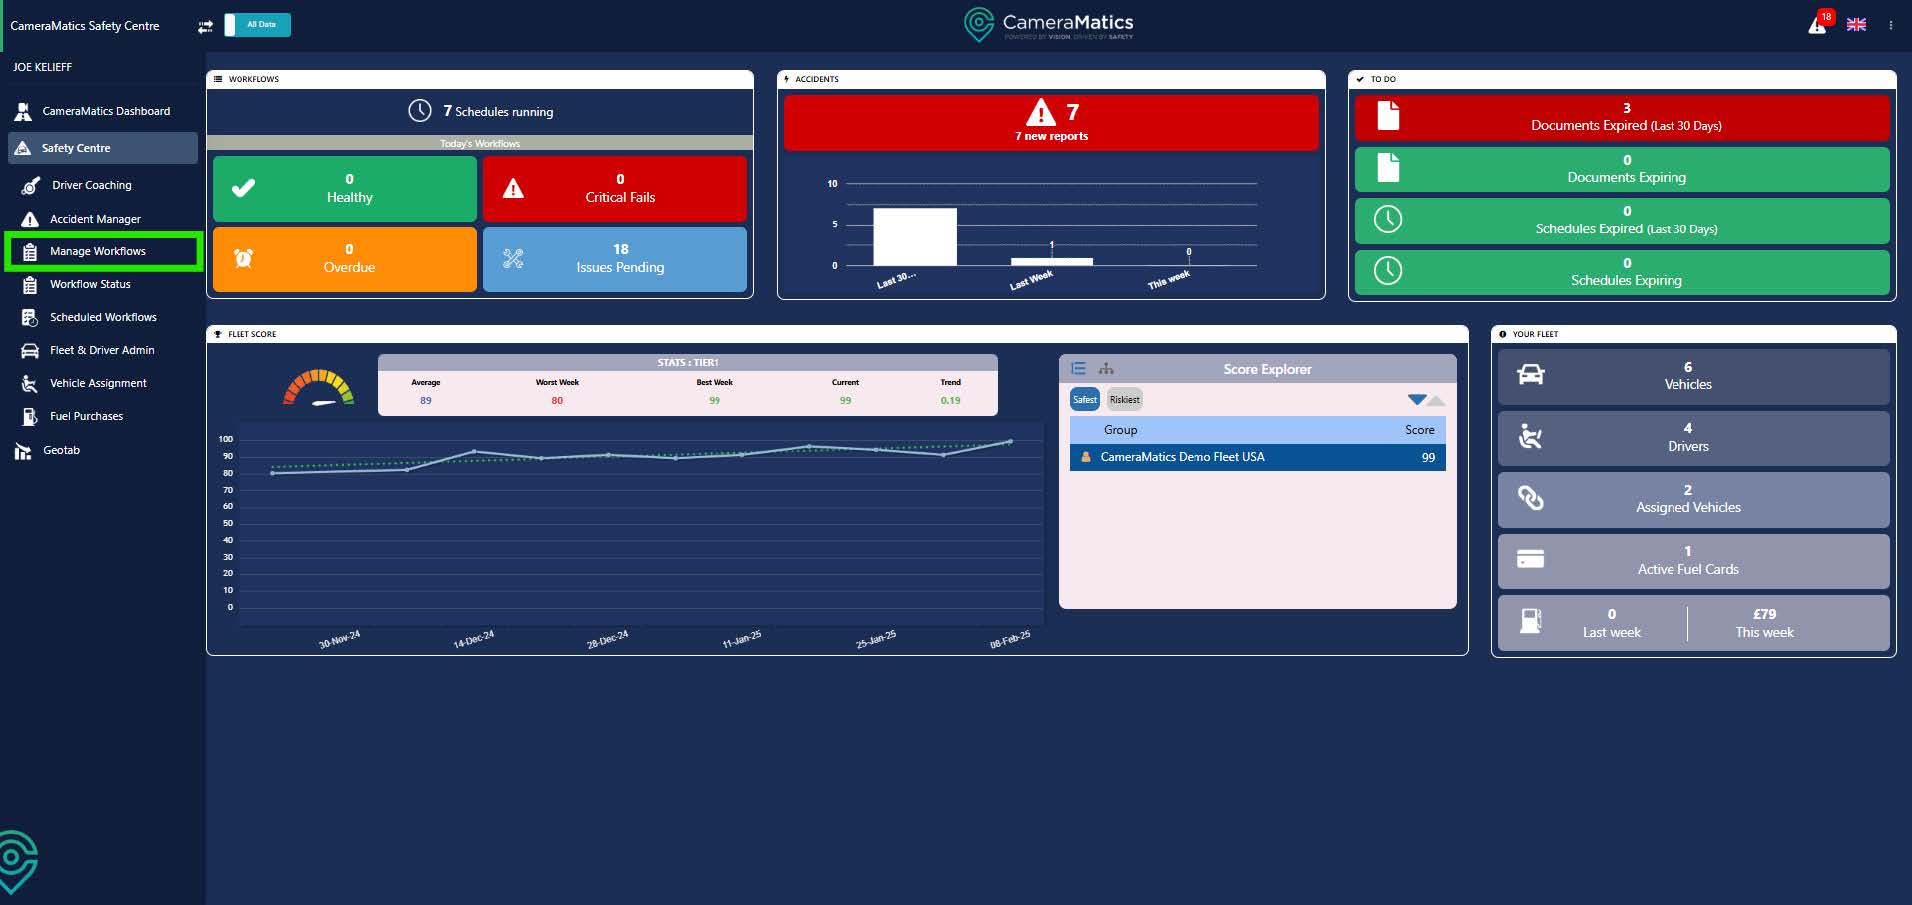
You will see Manage Workflows on the left-hand side menu. Click on this to begin creating your workflows.
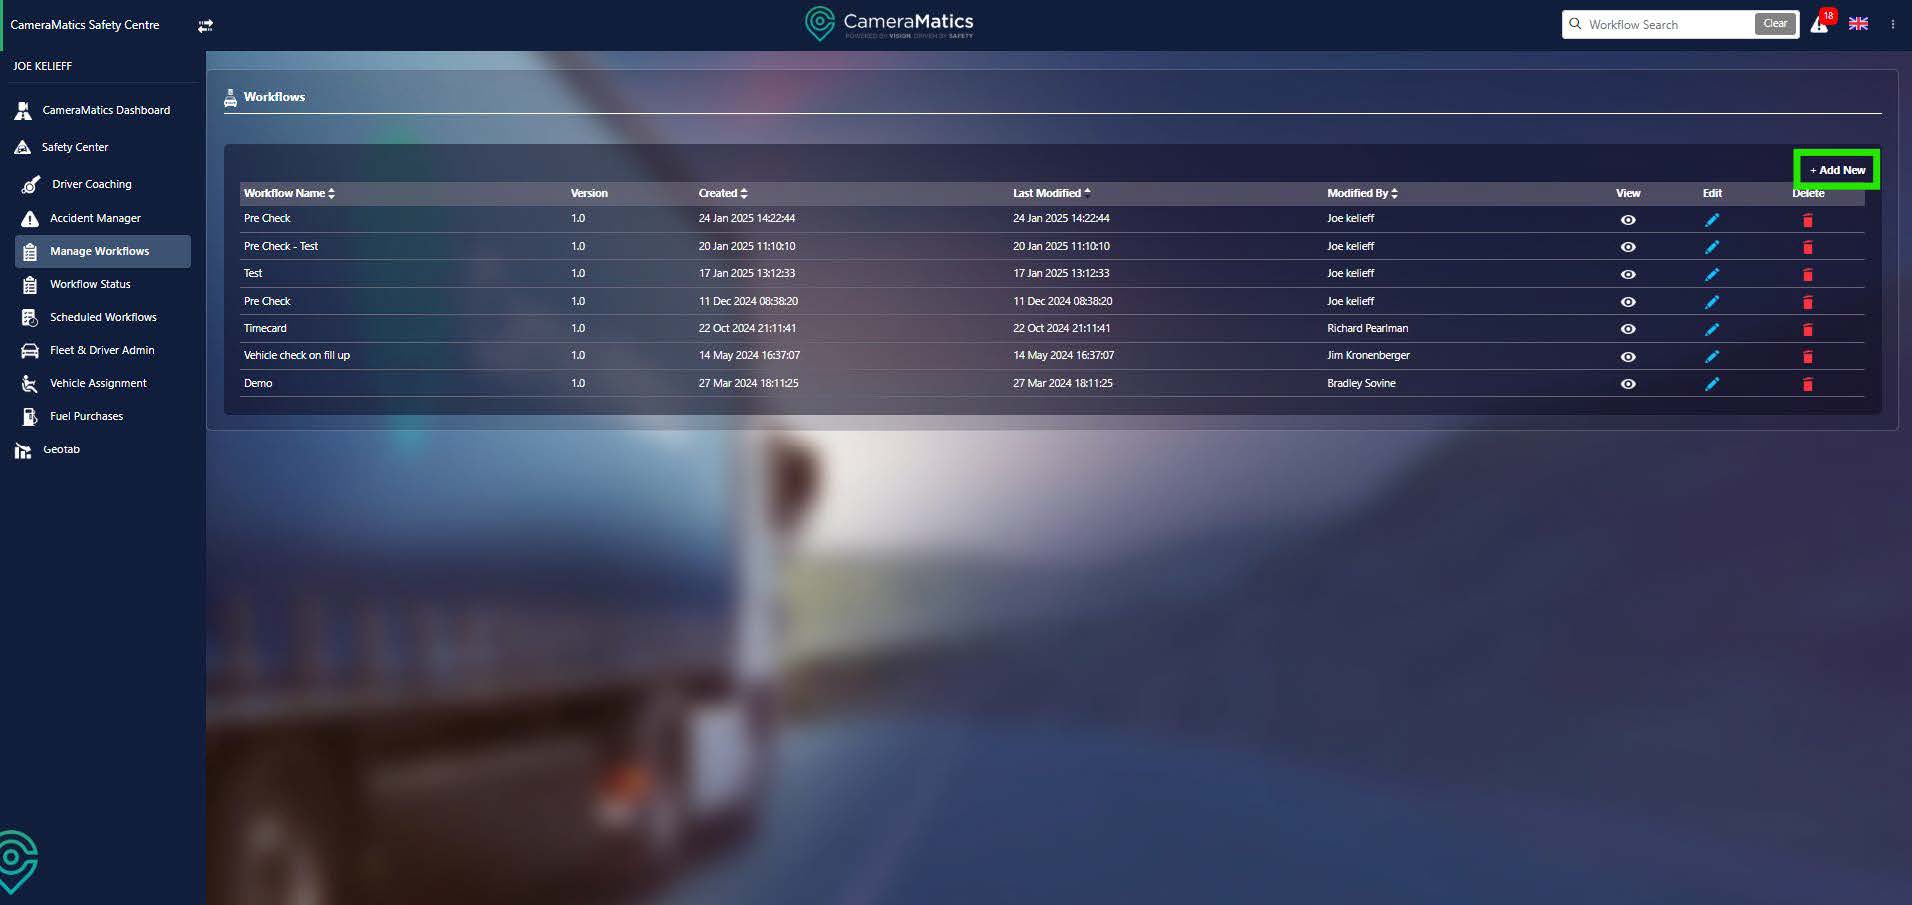
You will then see a full list of all workflows that have been created. You can examine, edit or delete these workflows from this list. To create a new workflow, click on Add New in the top right.
Once building a new workflow, you will see all the existing questions or workflow steps that are currently used in your instance of CameraMatics. You can edit these from this list, or delete them completely. Be careful when editing questions – they may be used in more than one workflow!
To create a new question click on Add New, this is found underneath the search bar which is above the existing questions on the left.
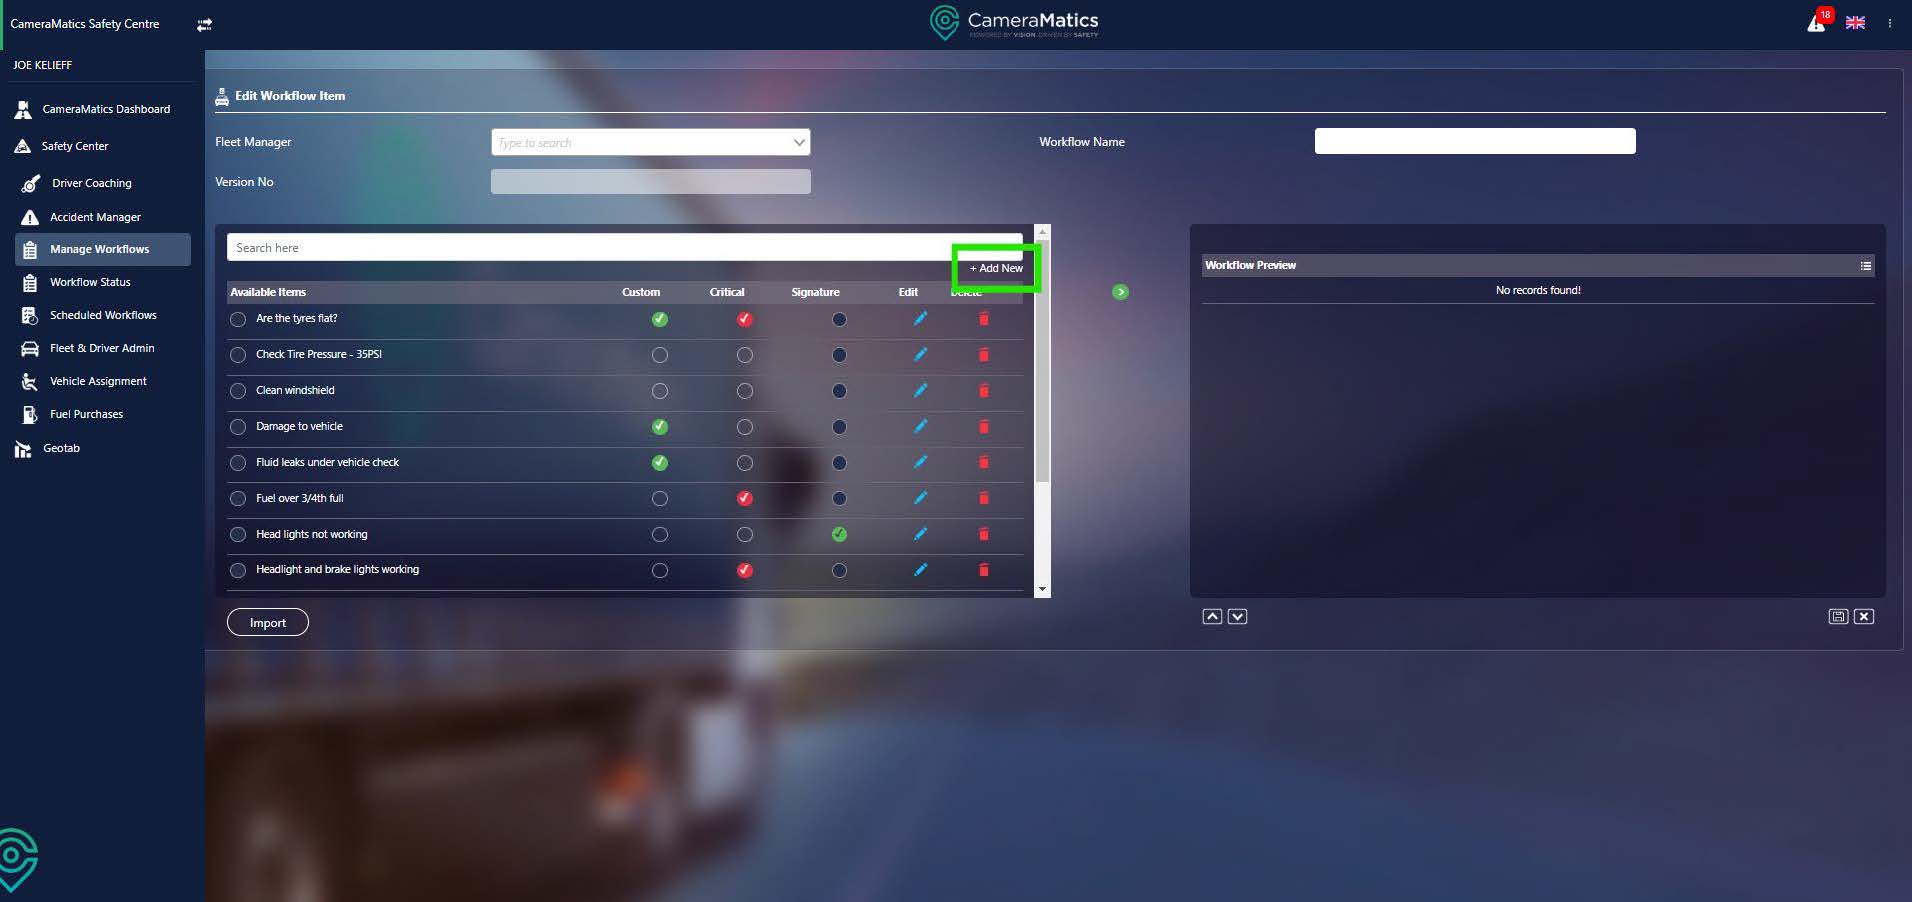
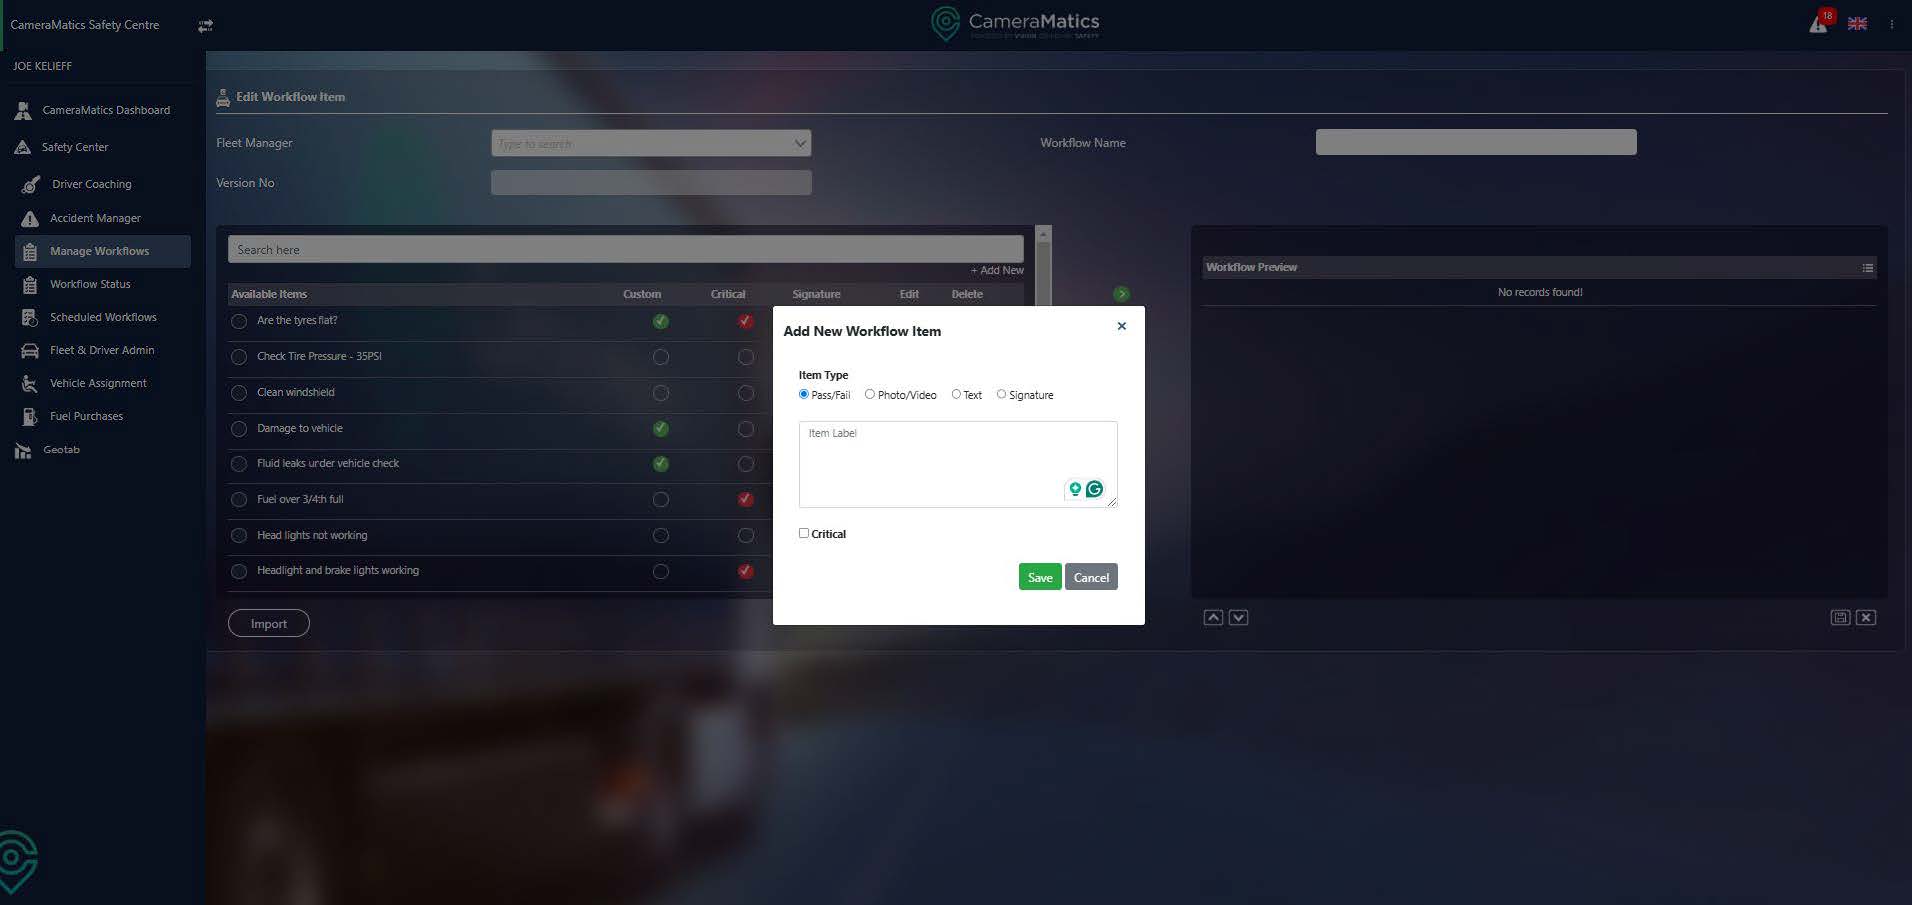
A pop-up now appears. Write the instructions, or question, for the driver within the text box. Then choose the form of response required from the options shown:
- Pass/Fail – the driver must mark the question or check as a pass or fail
- Photo/Video – the driver must submit a picture or video that is related to the question/instruction
- Text – the driver is asked to write a comment in response to the question.
- Signature – a signature or signoff is required
Below is a check box through with a check can be marked as Critical. When this is checked, a ‘fail’ on this specific question or check will mean that the entire workflow is failed. Using the example of a vehicle check, the driver will be informed that the vehicle is not road-worthy and cannot be used.
Once you have configured the question, click on save, which will add it to the list on the left.
Import Questions
You will see an import button below the library of questions for your workflows.
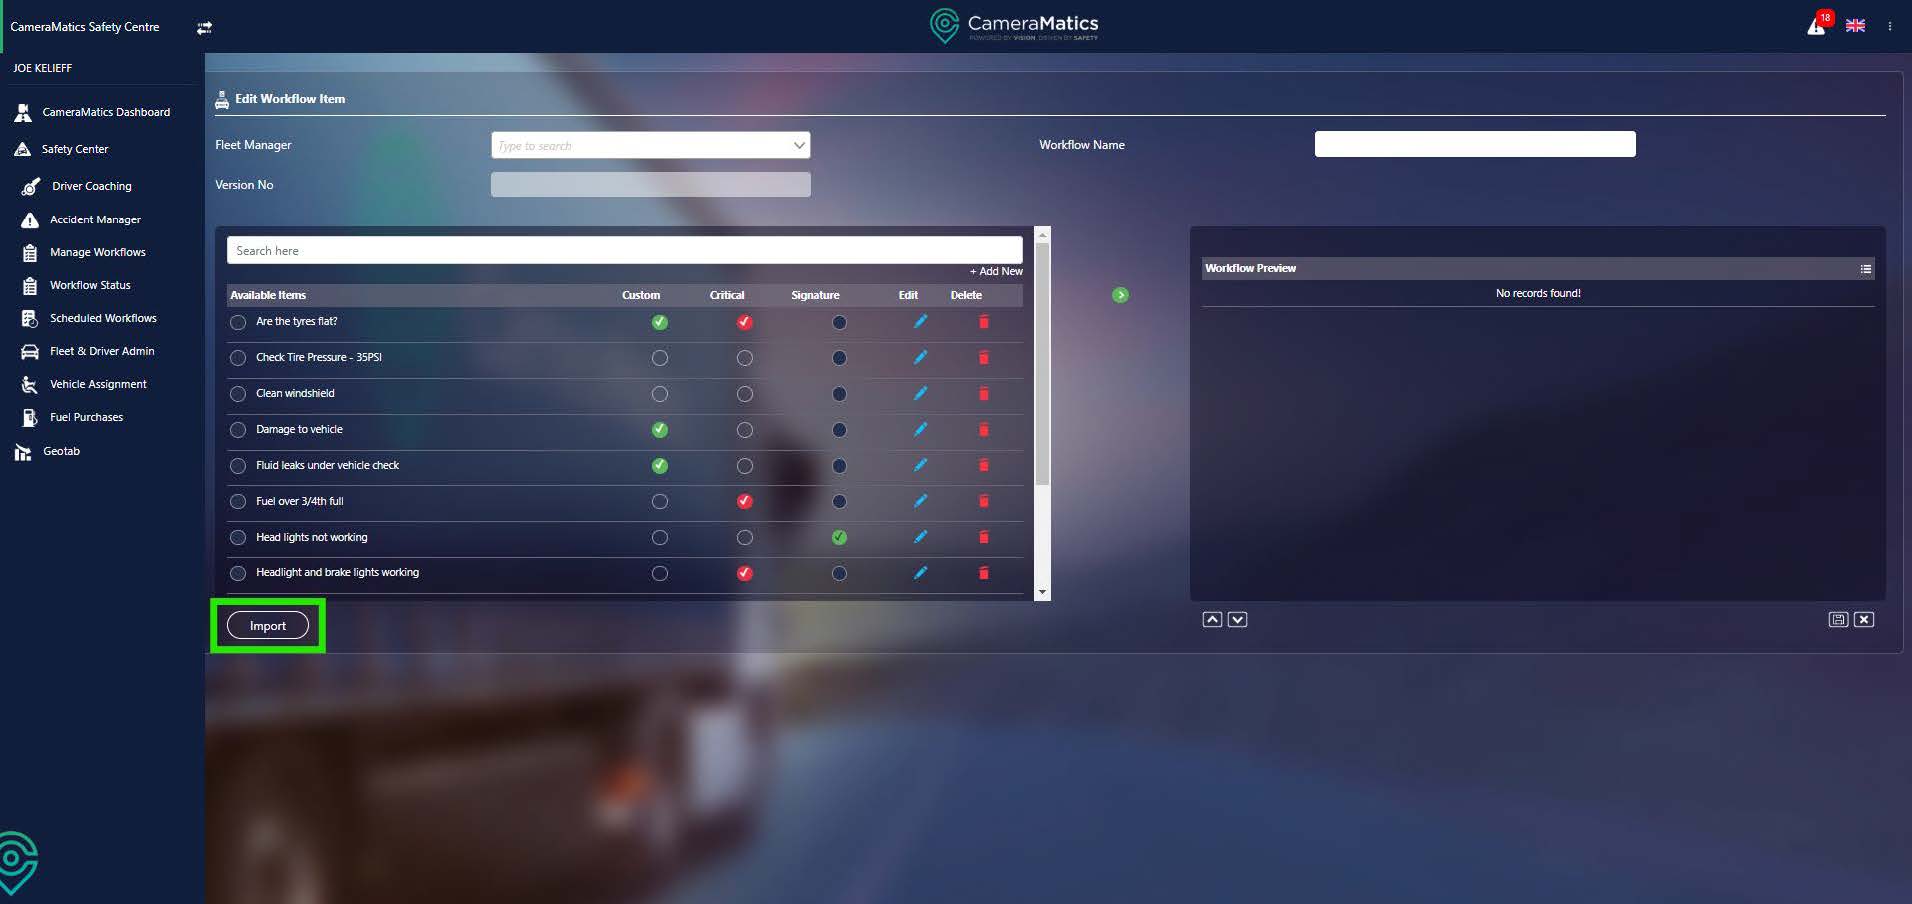
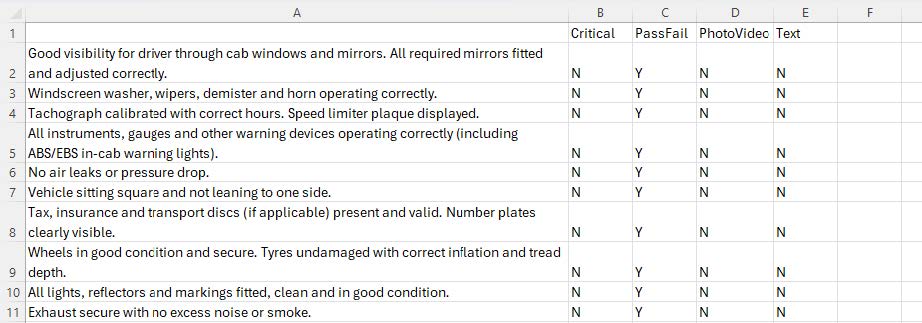
Clicking the Import button will allow you to upload an Excel form and bulk import multiple questions to your library. This Excel doc must have five columns indicating:
- The text of the question or task
- Critical Y/N
- PassFail Y/N
- Photo/Video Y/N
- Text Required Y/N
The example below shows the column headings and some sample data that will import accurately.
Create Workflows
To create a new workflow, click on Add New in the top right of the workflows home screen.
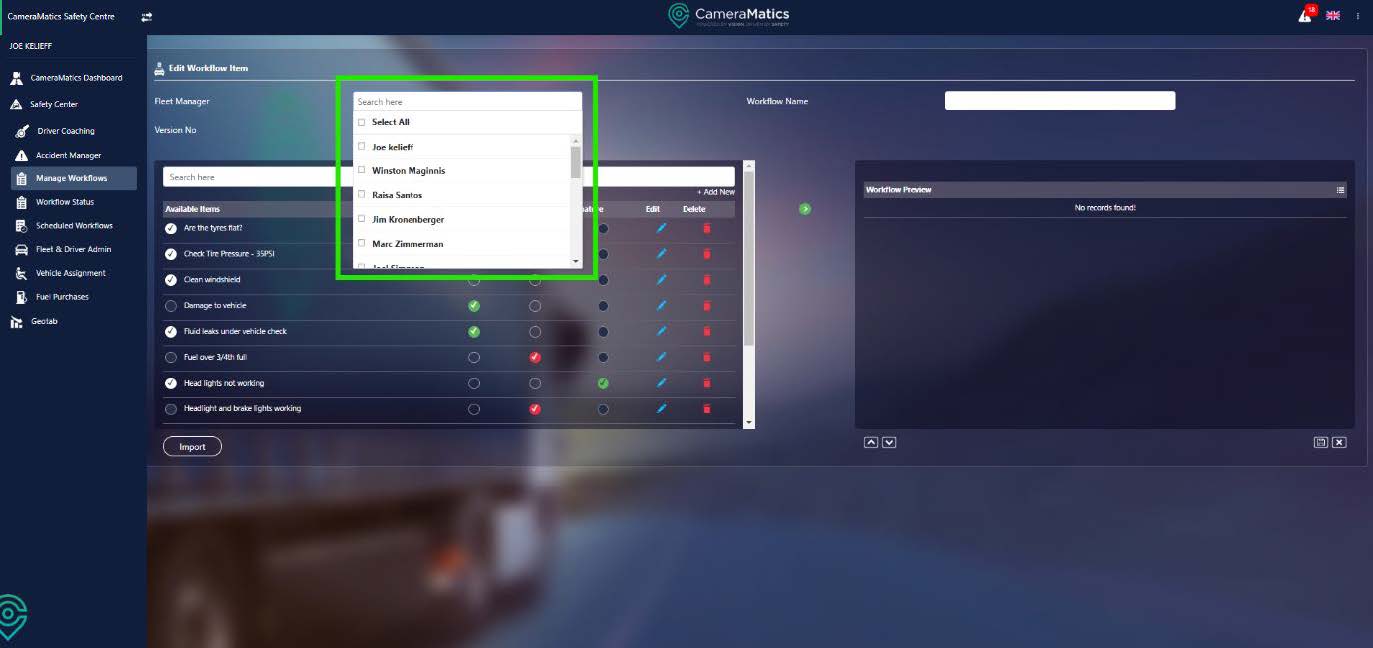
You will need to decide which fleet manager will be able to view this workflow. You can either type to search for the fleet manager or scroll to tick each. You can also select all.
Next provide a name for the workflow.
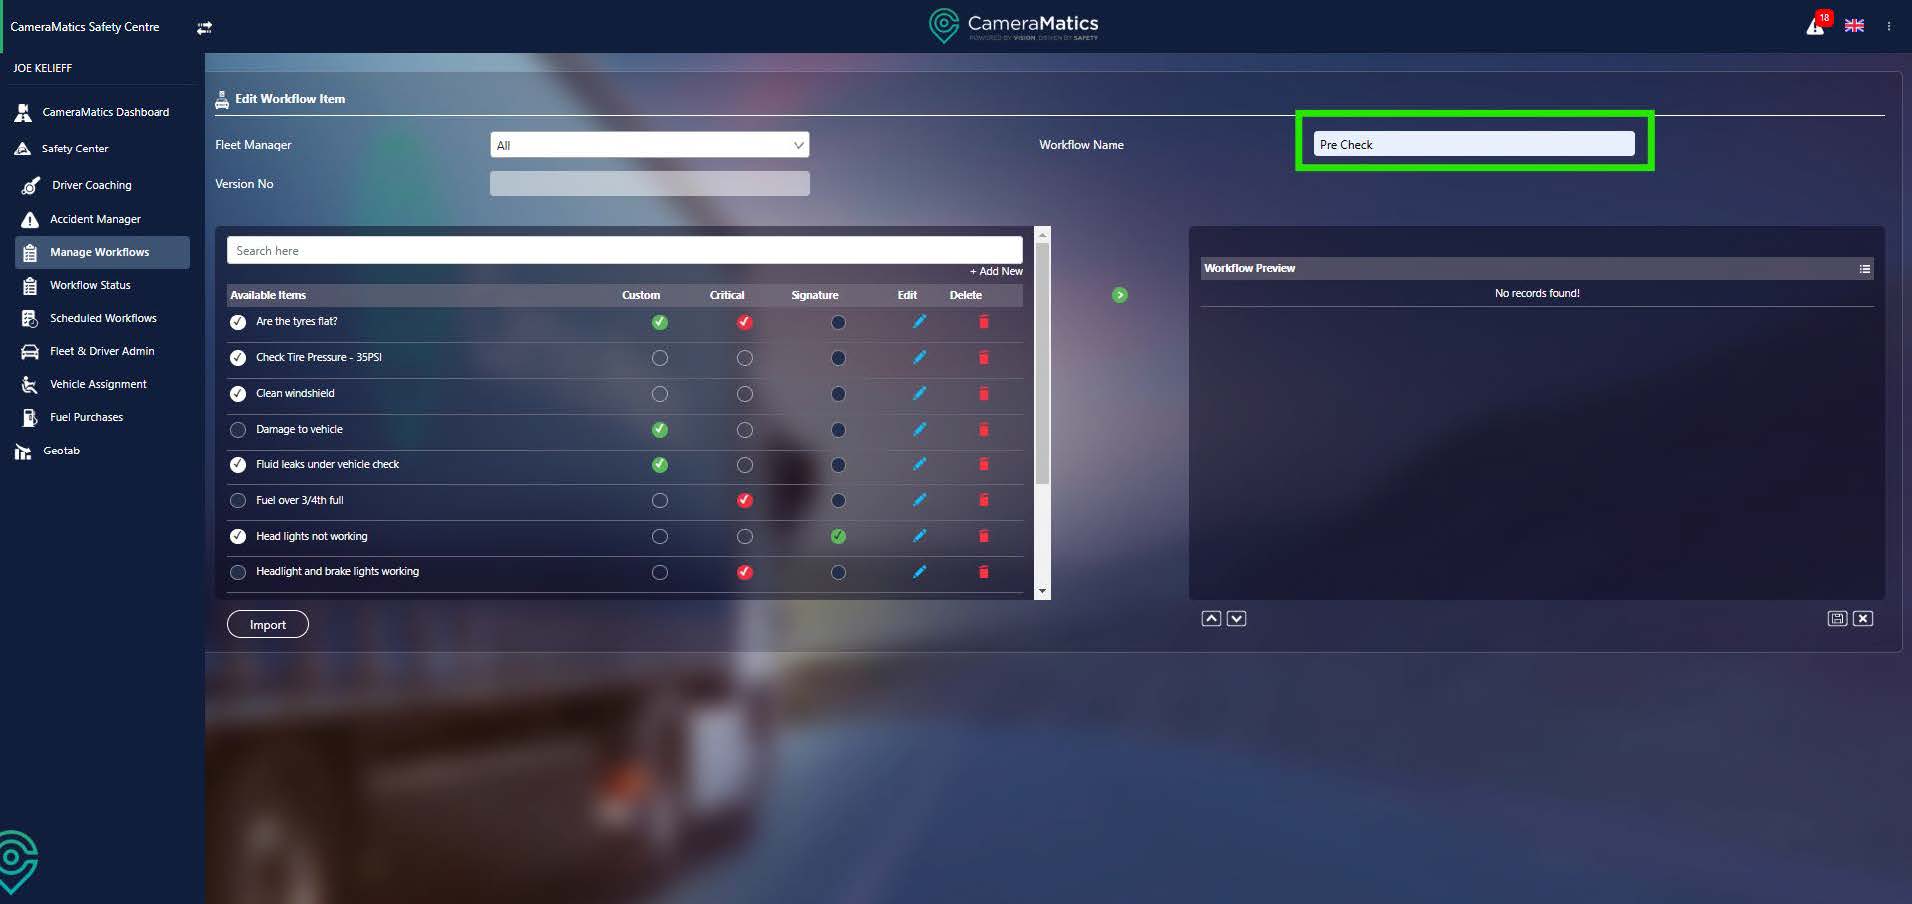
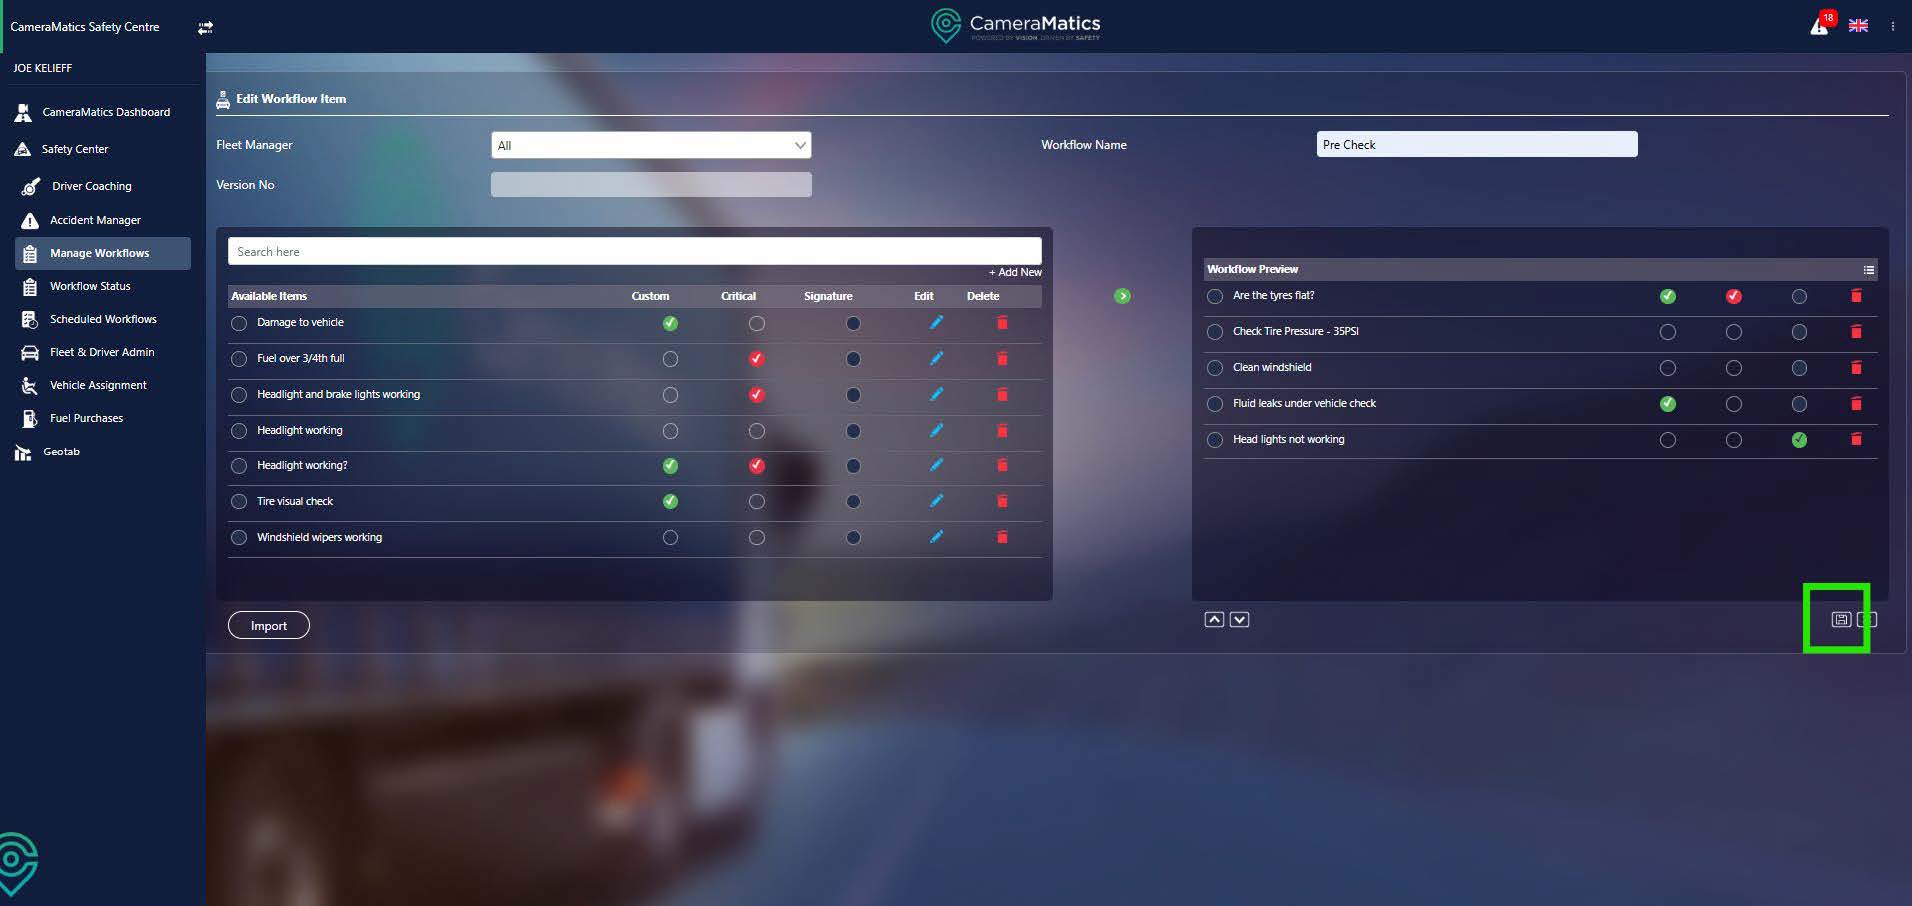
You can then choose which questions or tasks will be included in the workflow. This is done by selecting all the elements you wish to use in the left hand box, and then clicking on the green arrow in the middle of the screen to move them across to your workflow.

If you have accidentally clicked on a question, you can delete it from the workflow. Once you are satisfied with the workflow click save.
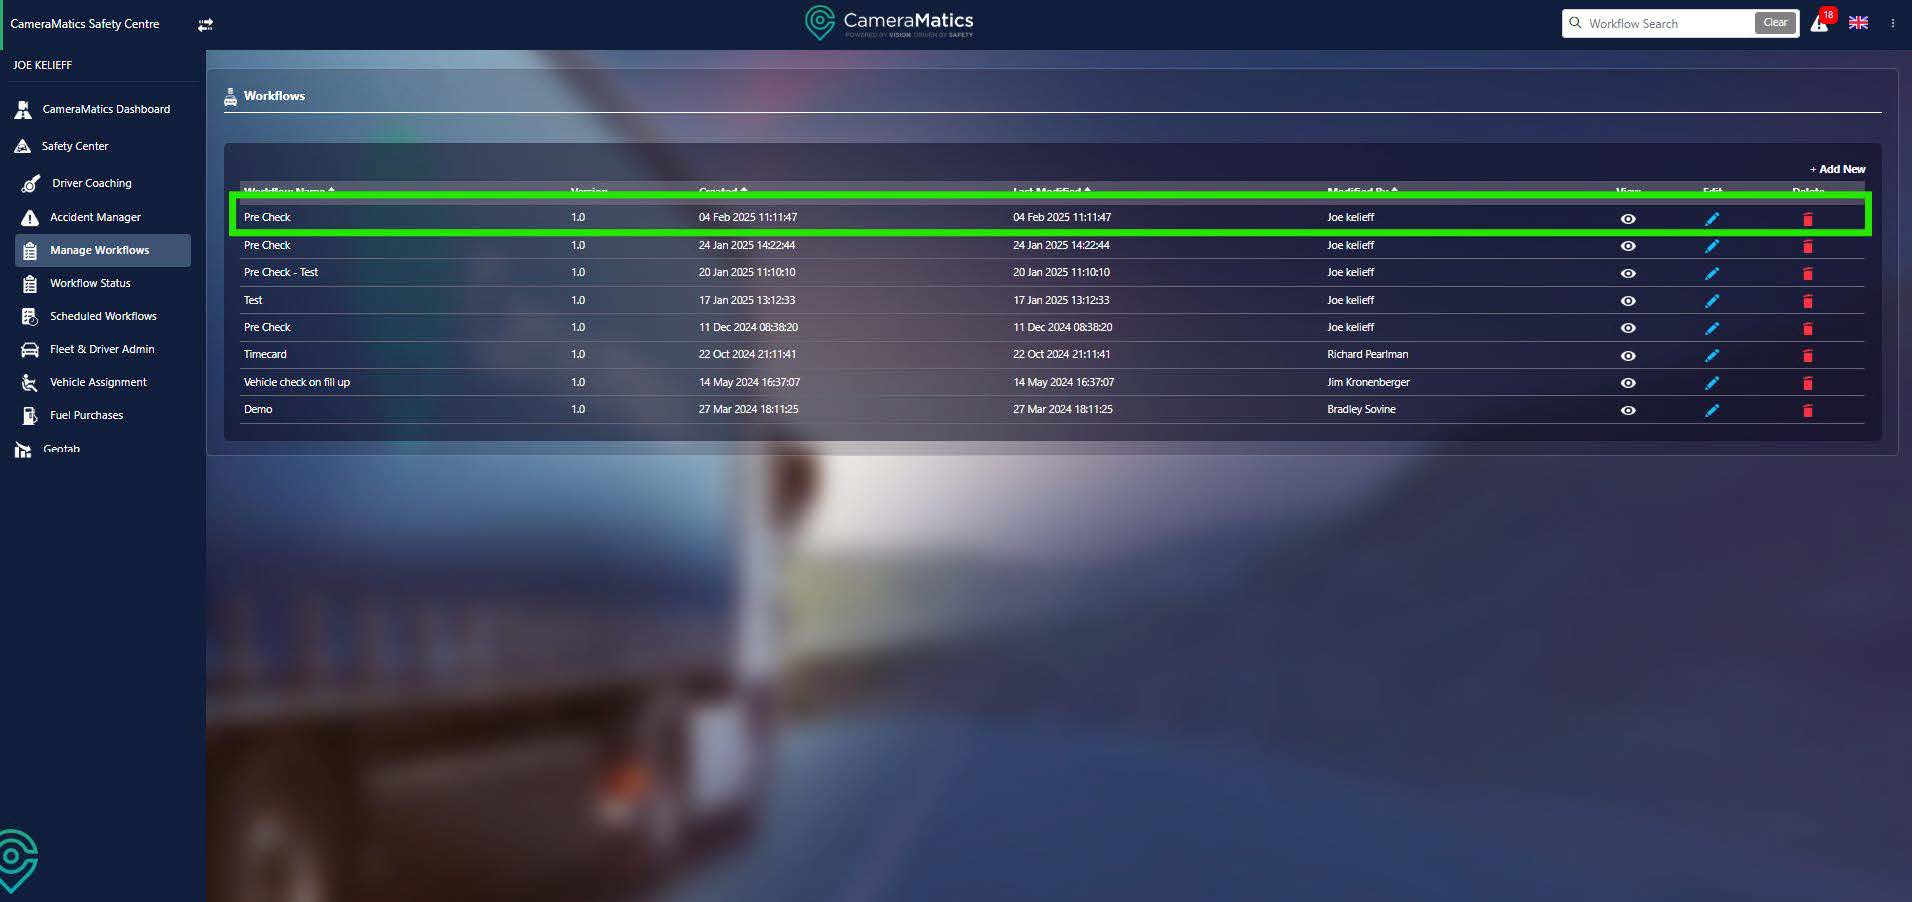
You will then be asked if you want to add this workflow to your list of templates, click yes and it will be added.

You will then be taken back to the templates that we saw before. You will then also see that the workflow you have created has been added.
Scheduling Your Workflows
Once created, workflows can be scheduled to take place at specific times, at specific frequencies, and by specific drivers.
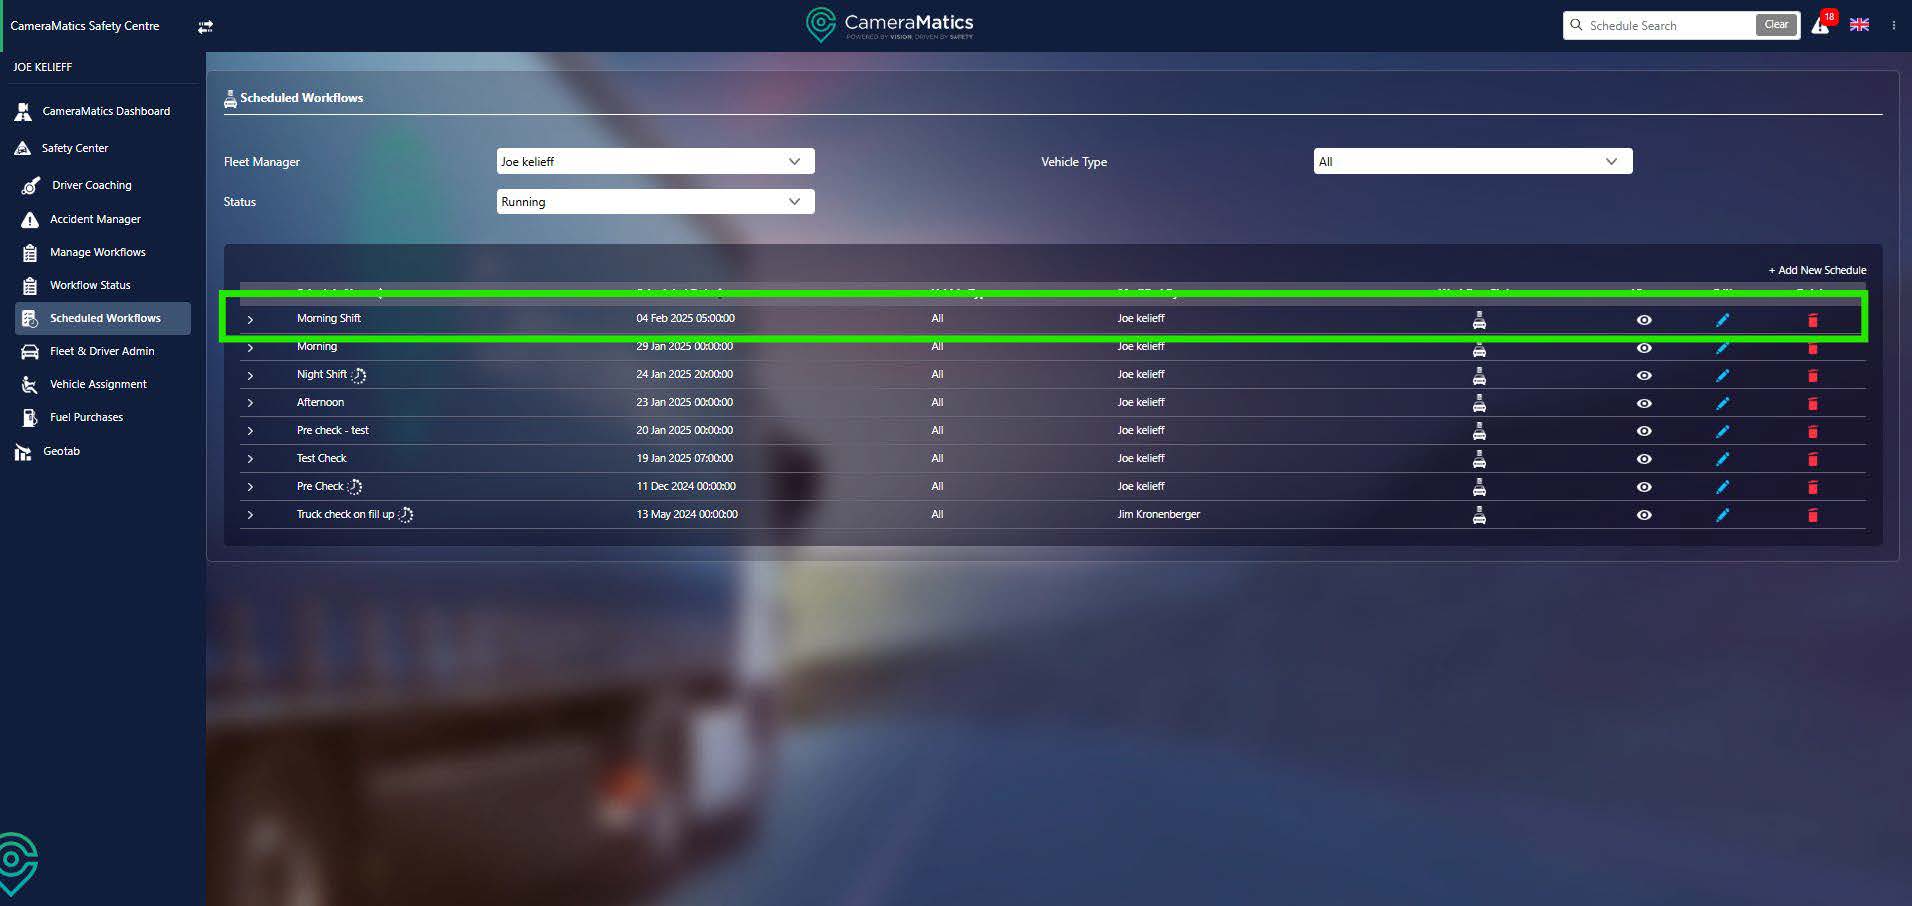
From the Safety Centre Dashboard, click on Scheduled Workflows.

You will now see all active schedules for existing workflows.
To create a new schedule, click Add New Schedule in the top right.

First, select the workflow you wish to schedule. If necessary use the search function to find what you are looking for if you have a large number of workflows in operation.
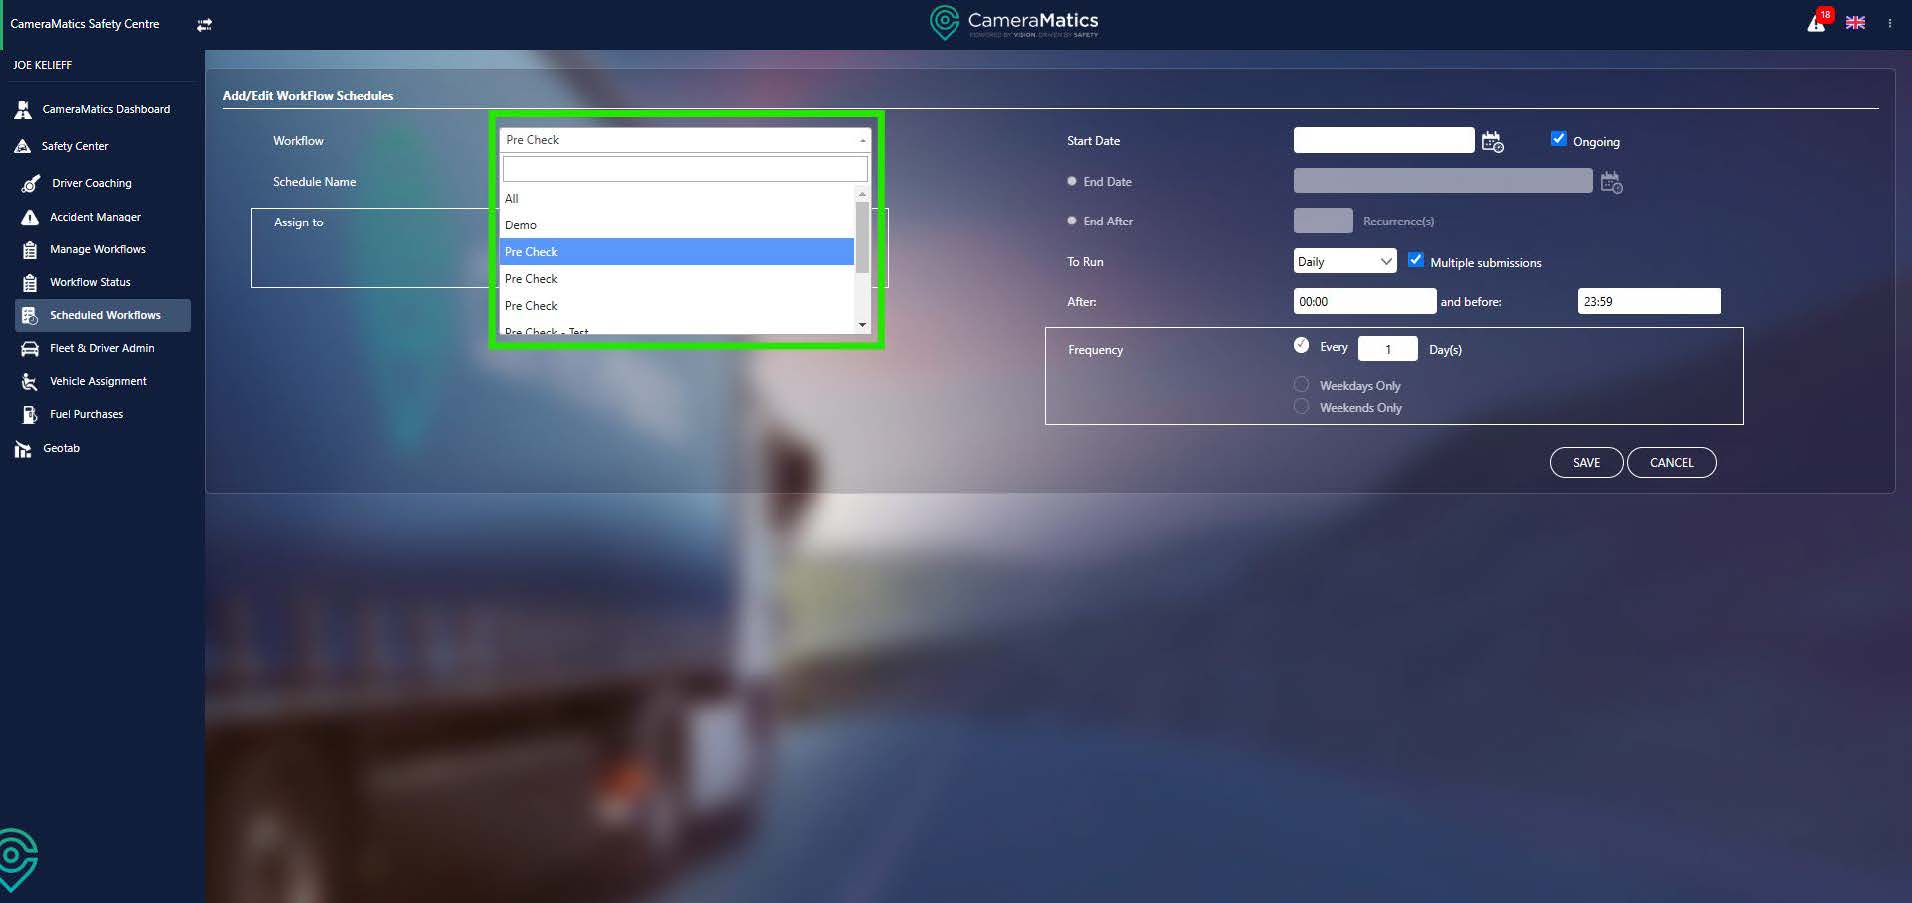
Next give the schedule a name.

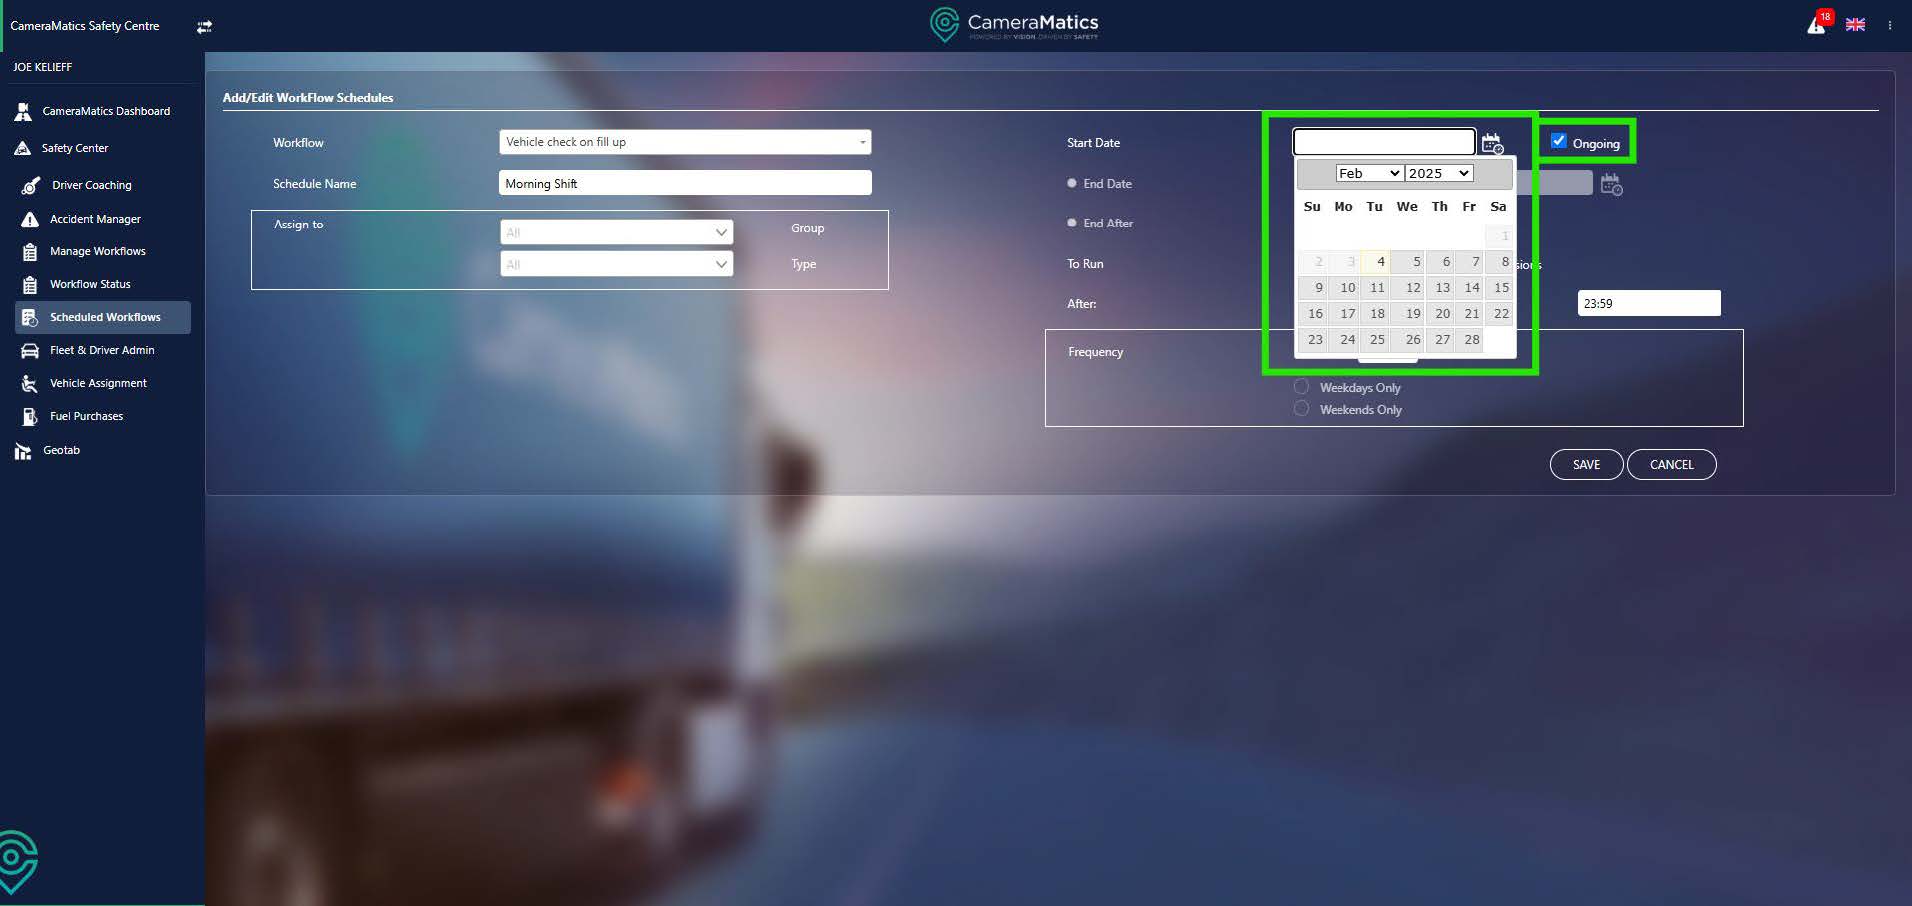
Next, decide who this schedule will be assigned to. You can assign schedules to either a specific driver group or a vehicle type.

Next define when the schedule will begin. Schedules may be open-ended, but if they are not, select an end date.
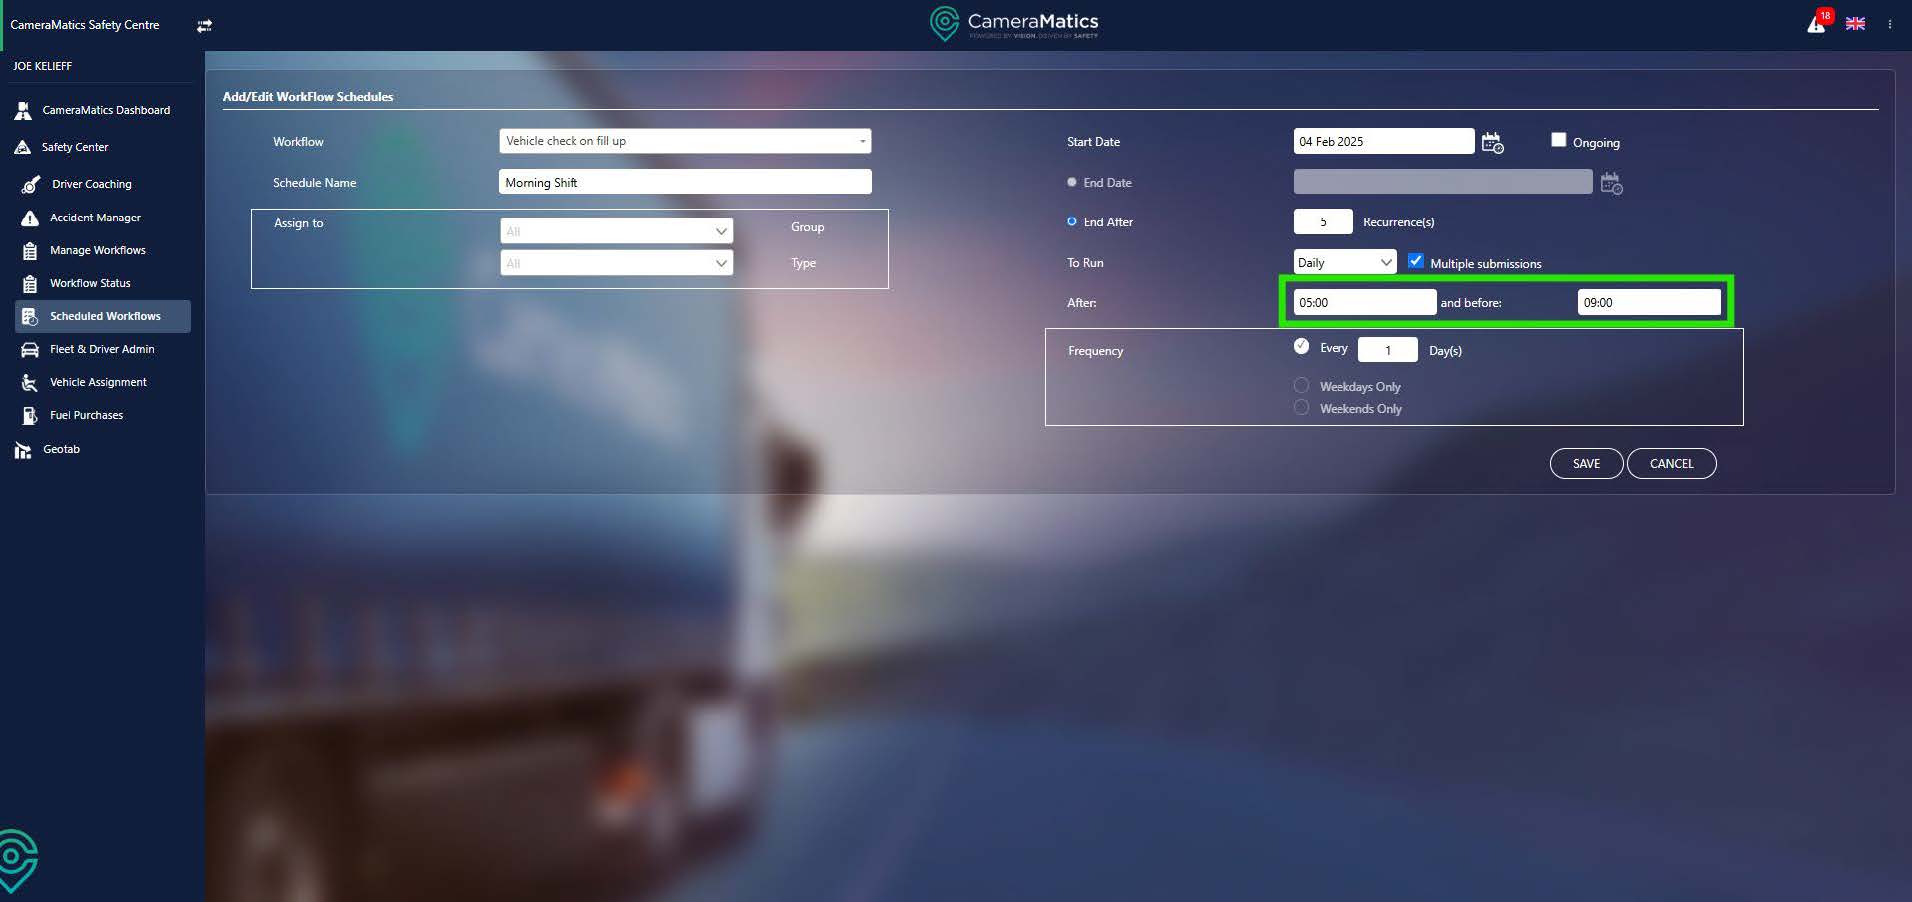
You may also choose to end a workflow after a certain number of recurrences.

Next you can define a frequency for your schedule. You can decide if the workflow must be completed Daily, Weekly, Monthly or Yearly. If you uncheck the Multiple submissions, then your drivers can only submit it once per the selected frequency. On the other hand, if it is ticked then they can complete the workflow multiple times.

Next determine the time of day when the workflow must be completed. This can be between any two times of day.
Lastly you can refine the frequency as follows:
Daily workflows can be set to run every other day, every third day, and so on.

- Workflows can be set to run on weekdays only

- Or weekend days only

Weekly workflows can be set to run biweekly or every third week and on specific days

Monthly workflows can be scheduled for the same date every month, or for every n months. This example shows a bi-monthly check on the 11th day:

Alternatively, you can decide it to be on a specific day and then determine how many months have passed. This means it could be on the third Tuesday of every 2 months.

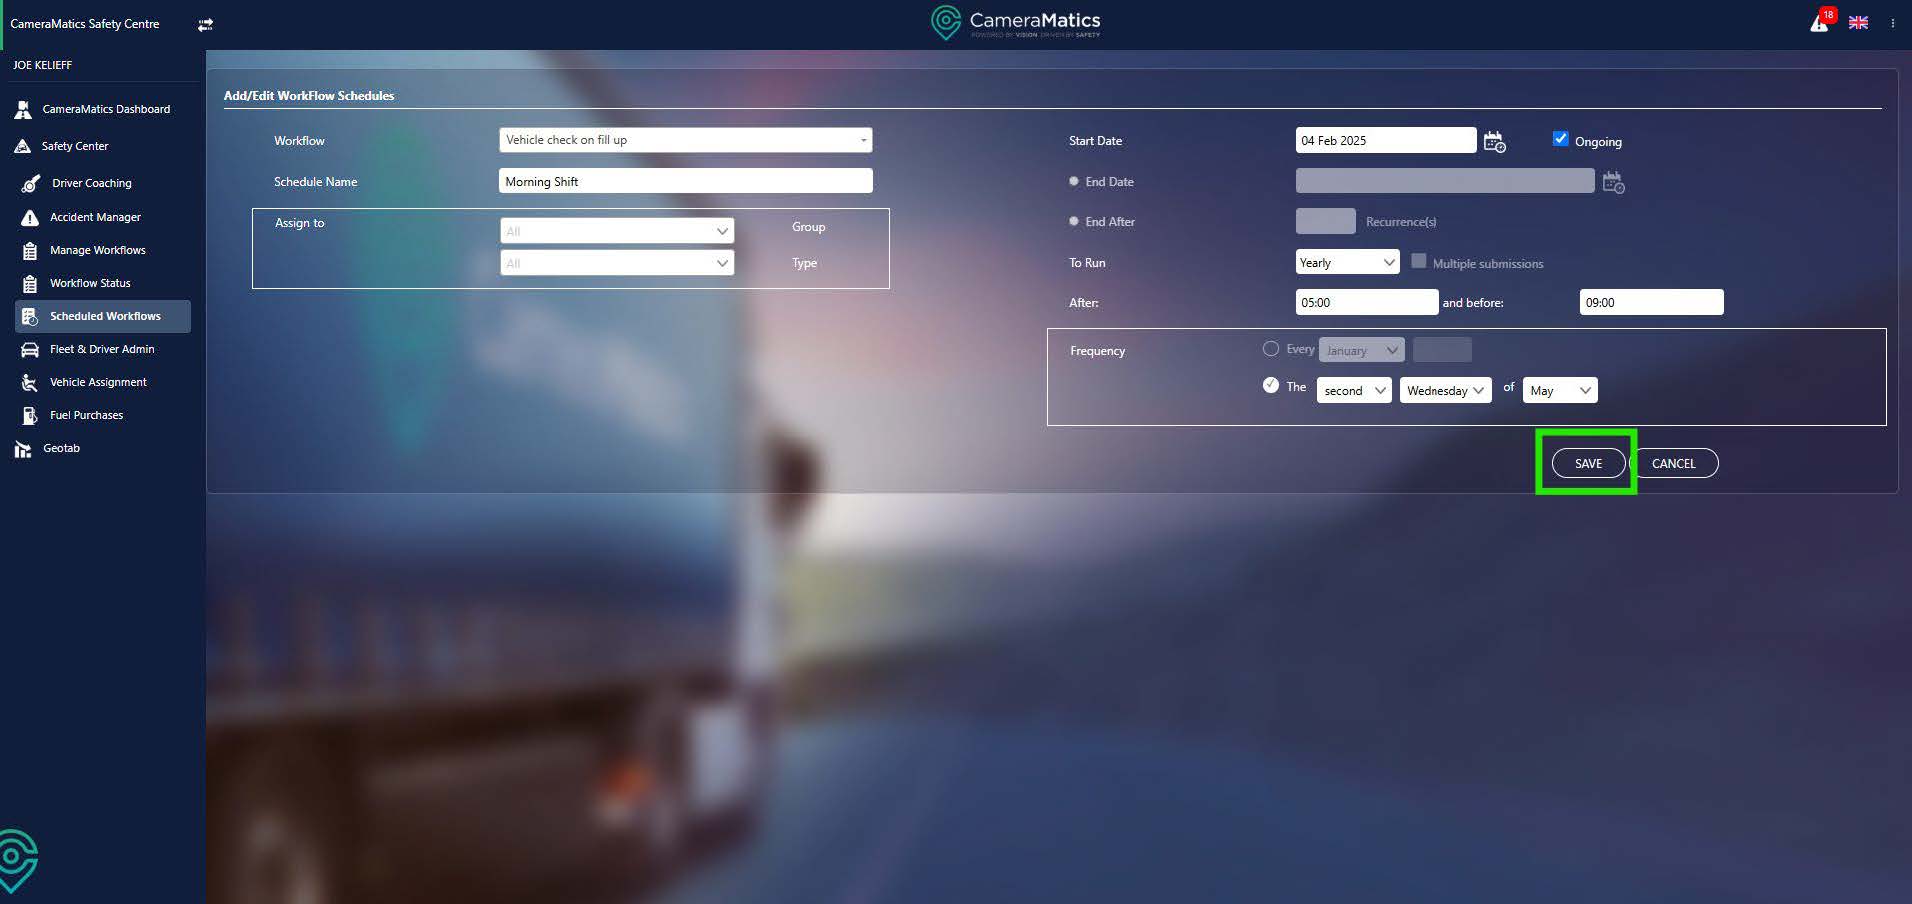
Yearly checks can be set for a specific date within any given month. The workflow will only appear on this date.

Alternatively, you can select this to be on a specific weekday within a specific month, such as the second Wednesday of May as shown here:

Once you have settled on the different configurations for your schedule you can save your schedule in the bottom right.
You will then be taken back to the list of schedules, with your new schedule added to this list. This means that the workflow the schedule is attached to is now available to your drivers within the CameraMatics SafeDriver mobile app.