Your fleet may go to places regularly, and with this, you may want to monitor efficiency or when your fleet enters and exits a zone. This can be done by creating zones.
Add Individual Zones
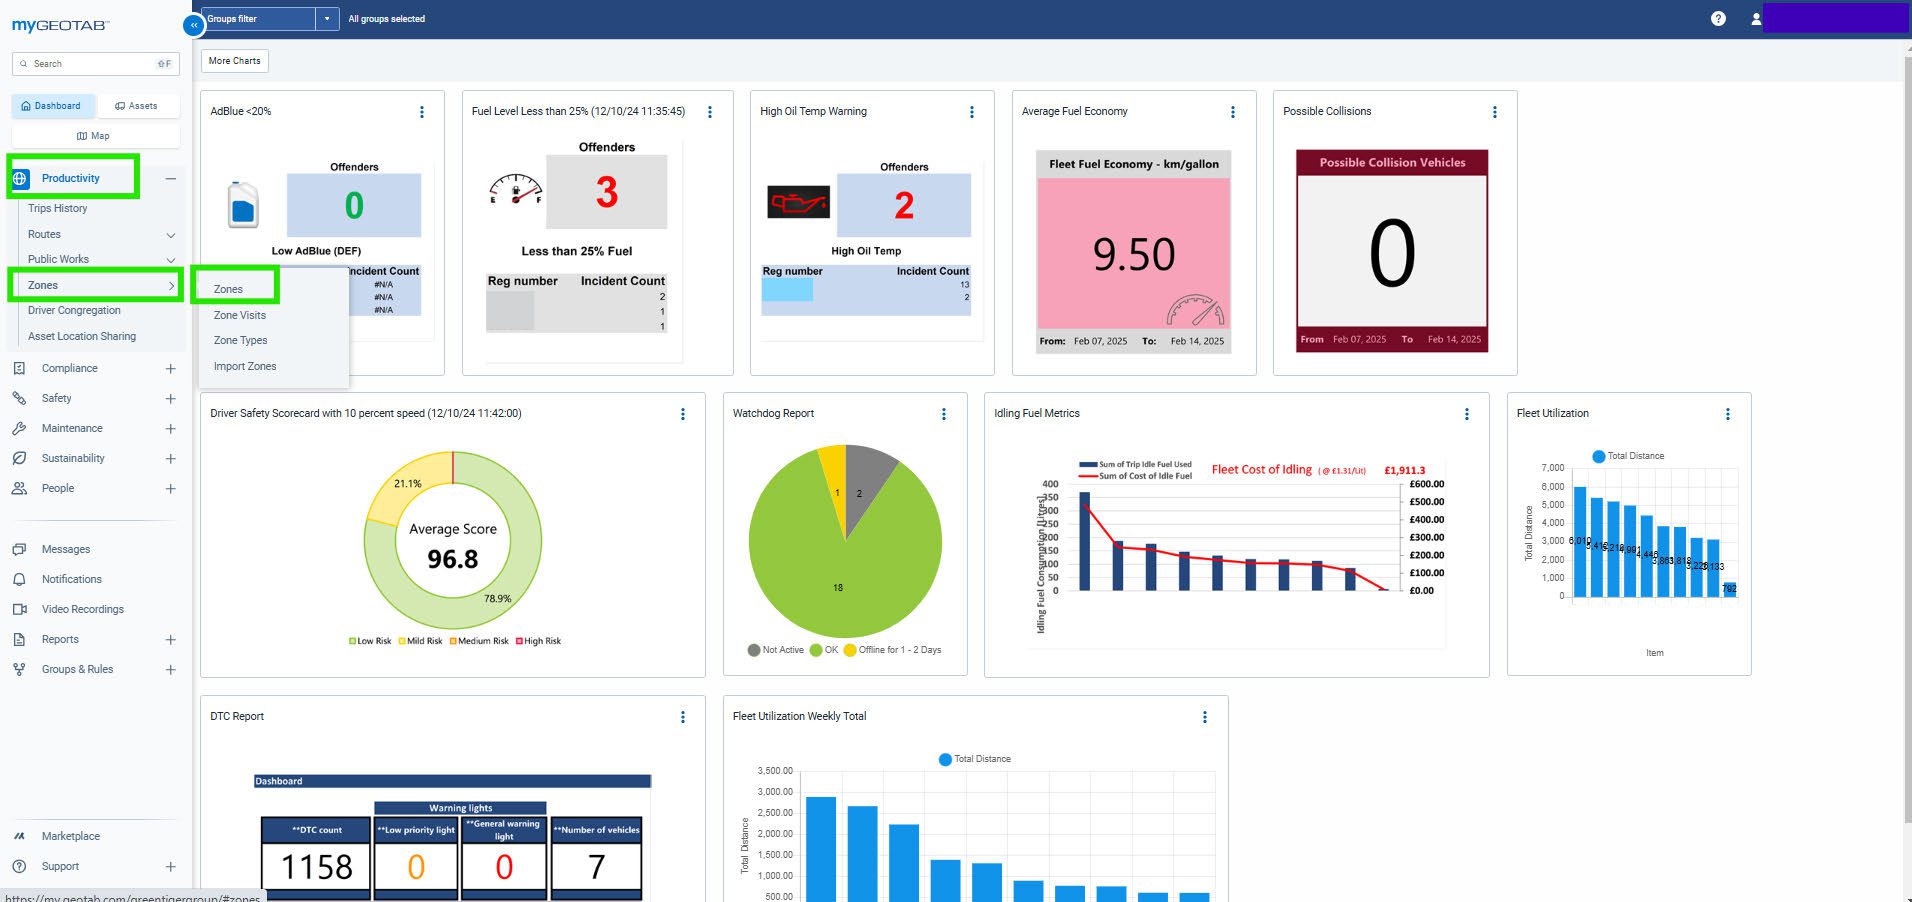
To create them, you will click on Productivity, then Zones and finally Zones again.
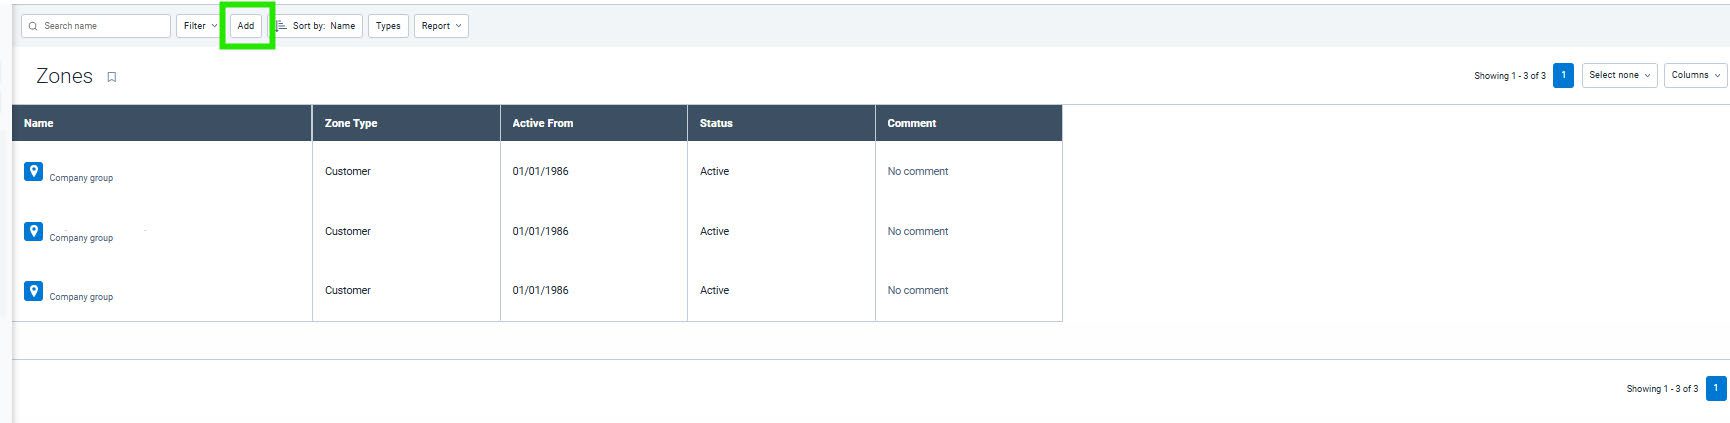
Here you can create a new zone by clicking on Add at the top.
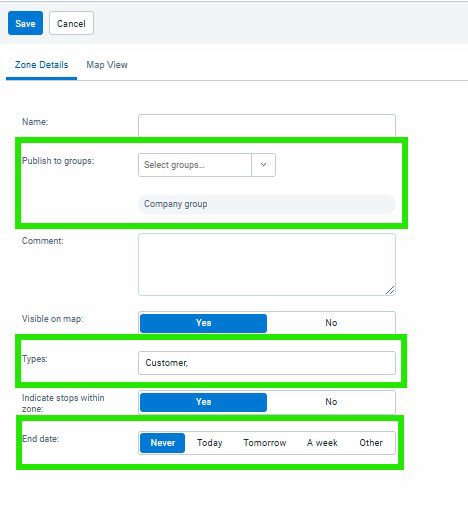
Now you will draw out the area by clicking on the map that the system took you to. Once you have completed the shape you will then be taken back into the Zone list area.

You will now need to fill out the details for the zone that you have made. You can also select a specific group that it may be part of and select the type of zone that it may be, such as customer zones. You can also, if required, select an end date for this zone to be effective.
Importing Zones in Bulk
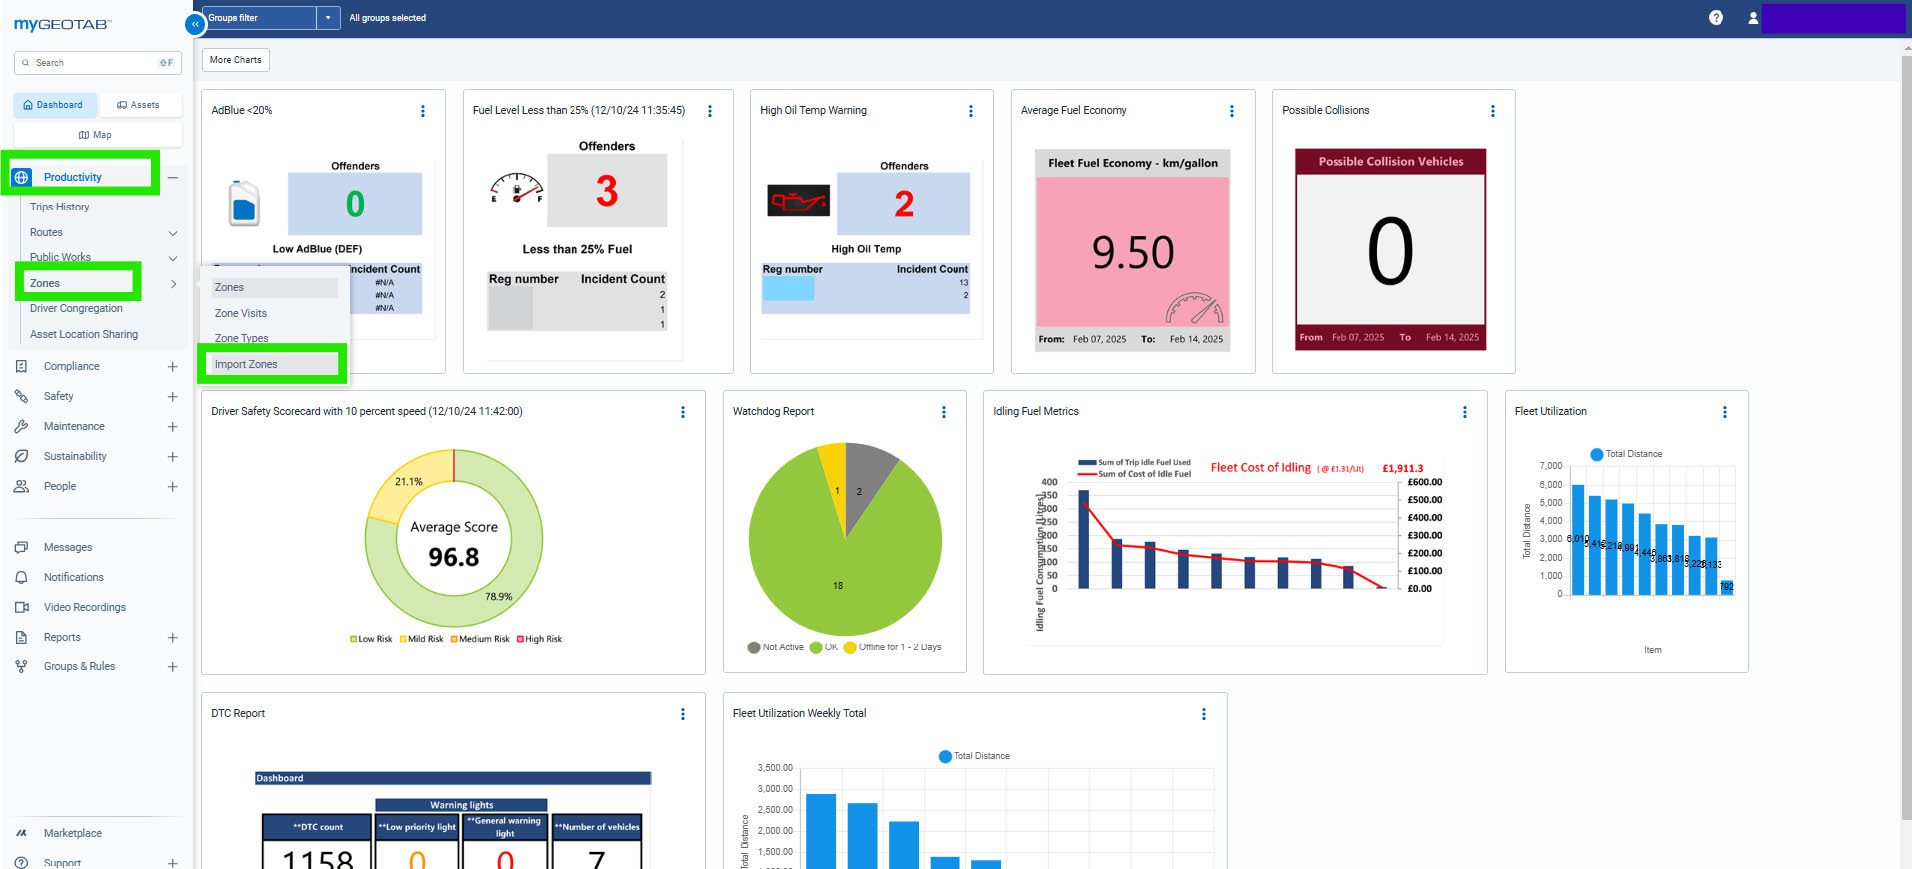
You may have a big list of different zones that you want to add all at once. To do this, you would click Productivity, Zones and then Import Zones.
You will see here the different templates that you would need to use on an Excel spreadsheet:
- Coordinate-Based Import – You will require the Longitude andLatitude figure for the location and then you will need to determine the size of the shape you require.
- Address-Based Import – You will need the address for these zones.
- Polygon-Based Import – You will need to provide the coordinates foreach individual point if it is not a circle or square shape. It is the most accurate.
Once done, upload the Excel file, and it will import each line as a zone.


